Pedalboards are so much fun to build. Choosing each individual pedal, deciding on a layout and then putting it all together: it’s a big part of the lifestyle for a lot of us.
That said, there are times when we go overboard with our pedal boards and can barely carry them! There can also be times where it’s just not practical to have a large board, such as playing on small stages or using public transport. In these situations, it pays to have a downsized board, armed with a small, concentrated collection stomp boxes.
In today’s blog, I’ll look at various different ways in which you can successfully downsize, shrink, focus in and altogether make the most of that real-estate you have at your feet. As a pedal specialist during my sales floor days - and as a gigging guitarist - I’ve connected, carried and used more pedal boards than I can remember. Let my years of trial and error come together to provide you with some solid tips!
On top and On the Side
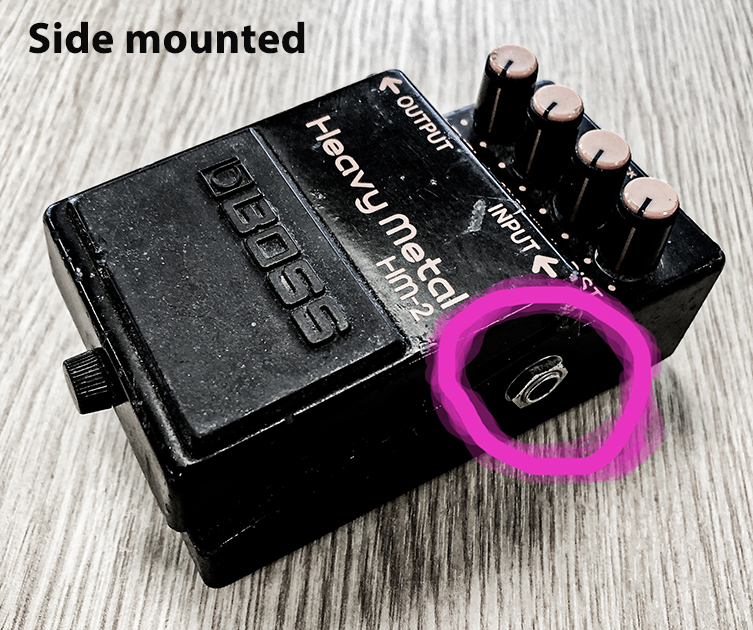
Here’s a quick convention for you, so we’re singing from the same hymn sheet. When I talk about side-on connections, it’s that typical MXR or BOSS way, when the input and output sockets are on either side of the pedal. Here's a handy little info-graphic for you...
Top mounted sockets, or ‘on-top’ connections refer to those that are up on the top edge of the pedal.
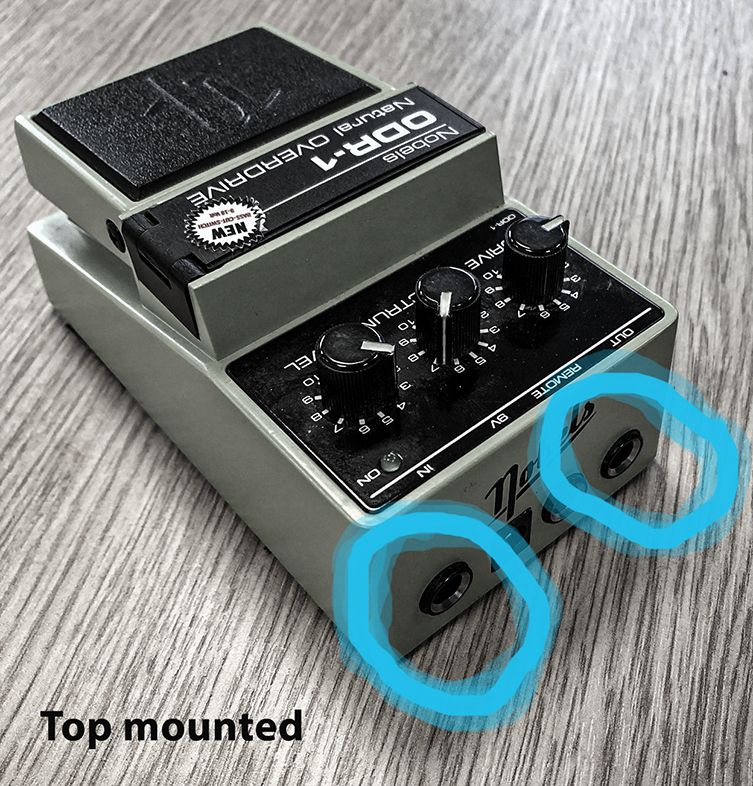
Both input and output sockets are on the same panel, which can potentially free up a lot of space on your board, particularly if you want your effects in one big line.
Maximise your space
Firstly, you may not necessarily want a physically smaller board as much as you just want to make better use of the space you have. I understand that for sure. Here are some methods to maximise the space on your board.
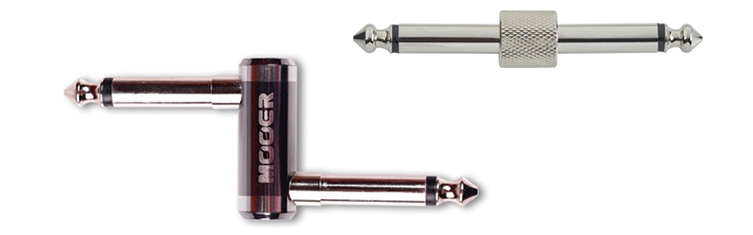
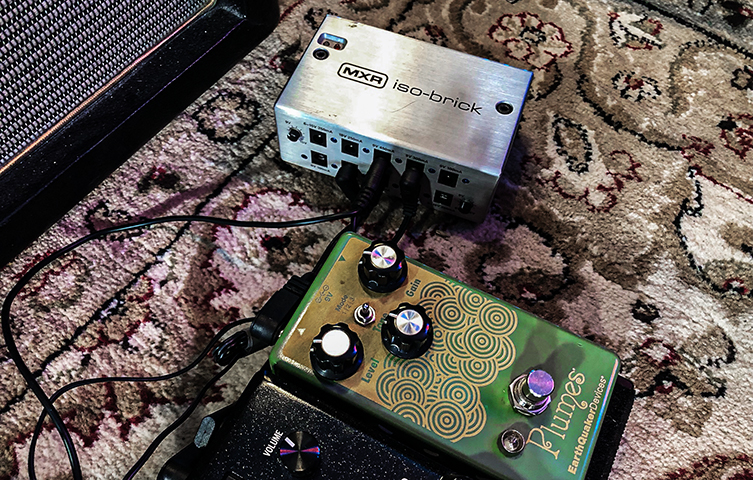
Use barrel jacks/S or Z connectors: these are patch cables with no actual cabling, just a pair of jacks. Put these between pedals with side-on connections (rather than on the top) and save big on space by having the pedals as close together as possible. The straight barrel (sometimes called an S-connector) is perfect when the sockets of each pedal line up, and the Z connector is good when they mismatch a little.
Consider sidejacks only or top mounted only: this continues the previous idea, but makes the most of normal patch cables by keeping them out of the way of your pedal flow. How? Well, having only top-mounted sockets, you can have your pedals all sitting really close together, and by having only side by side, you can more easily fit two rows of pedals on your board.
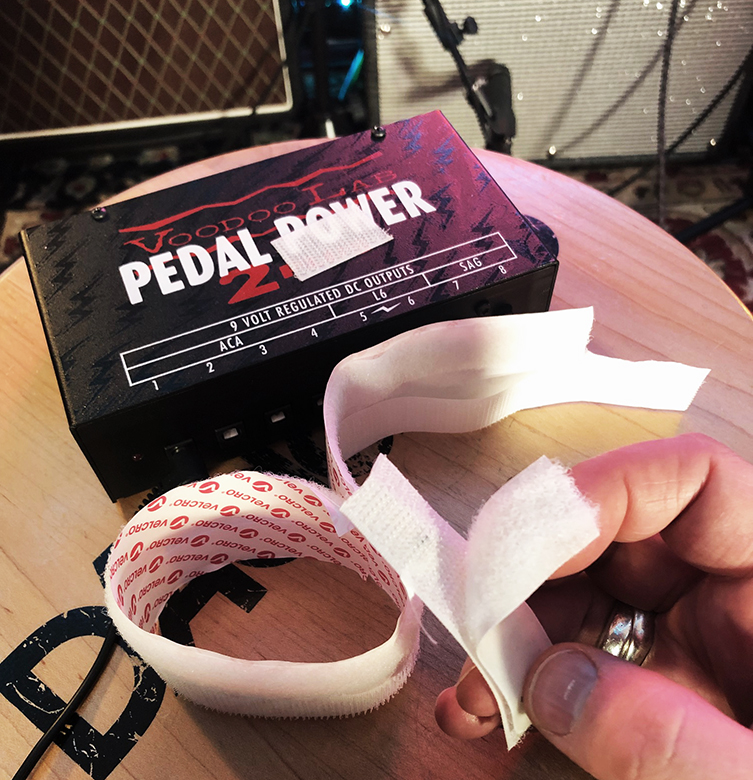
Attach your power supply underneath your board: take some of the velcro you use to secure your pedals, and fire some on your power supply. Attach the other side of the velcro to the underside of your pedalboard and free up some much needed space on the top! Most pedalboards are wedged-shaped, so your supply should fit underneath without any problems.
Keep your power supply and wah pedal off your board: If you can’t keep your power supply attached under your board (see previous tip), take it off altogether. It’ll be fine sitting on the floor next to your board, and so will your wah pedal. In all honesty, I personally don’t like having a wah pedal on a pedal board anyway: the operation of it is compromised by other pedals getting in the way, I reckon. Set it free and position it anywhere you fancy on the ground! This allows you to use a smaller board, or to fit some other pedal(s) in place of the wah on your board.
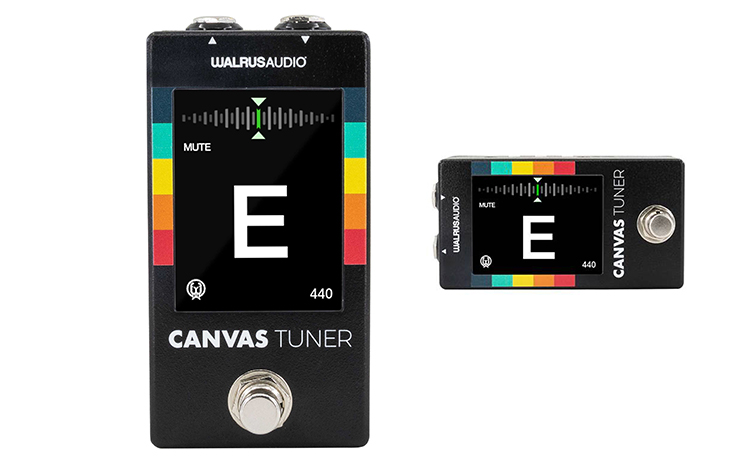
Play Tetris with your pedals: Arranging your pedals in a combination of across, up & down and so on will make the most of your space. This might mean using a vast array of patch cable sizes or indeed creating your own with a Patch cable kit. One cool thing I like is the new Walrus Audio Canvas tuner, which has a display screen that can adjust to be read ‘portrait’ or ‘landscape’, as it were. This is a great idea and I’d love to see more pedals being so adaptable!
Lose the Tuner: Now, I hasten to say immediately that I don’t want you to lose your tuner altogether! Maybe, though, a clip on headstock tuner will do the job instead, saving you some space on the floor! Hey, don’t leave the tuner on your guitar when you’re playing though. It’s a bad look and it all matters, okay? Okay.
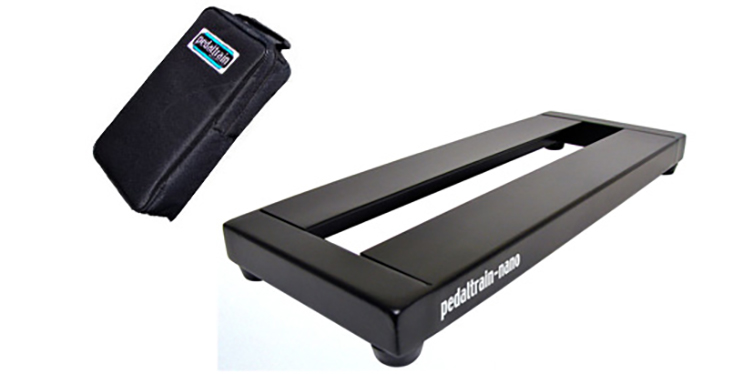
Create a Nano Board
It may be that, as we said at the start, your setup is just too large to cart around. You want something more mobile and easy to commute with.
You need a nano board.
What is a nano board, then? Simply put, it’s a small pedalboard. Initially, nano boards were developed to support nano-sized pedals, the type of modern downsized stompboxes that are so small, they can’t even accept a 9v battery!
Nano pedals (it’s a nickname more than anything, but I think Electro-Harmonix started that trend) were designed to better fit a pedalboard, so if you populate an entire board with these, you can fit a lot of effects on!
More specifically though, if you only use a few of these nano effects, then you can get away with using a pretty small pedalboard! Brands like Ordo and Pedal Train all offer smaller boards, so downsizing is easy. The only thing you need to decide is which pedals to use!
Populating a Small Board
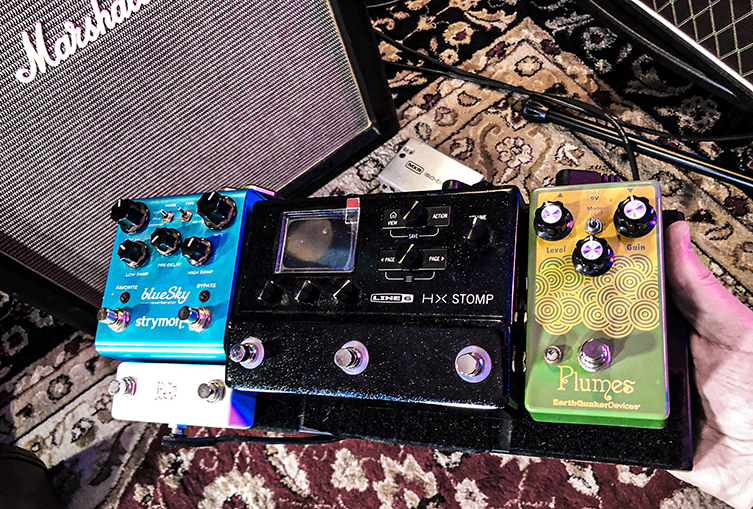
Okay, so let’s say you’ve decided to go small and put together a small ‘nano’ pedalboard. Now, you don’t have to stick to nano-sized pedals, but let’s try for a few at least, since the whole point here is to downsize.
We’ll do the clip-on tuner idea from earlier, and we’ll assume the power supply can fix under the board. This leaves the noise-makers themselves. By my thinking, we can cover a ton of ground with just four pedals: two gain pedals, one modulation and one ambience pedal.
Here’s my suggestion: a light overdrive (like the Ibanez TS MINI Tubescreamer or any ‘Klone’ such as the Wampler Tumnus Mini), a higher gain distortion (pick the one you like! Rat, Riot, DS-2 etc etc), a flanger and a delay.
Why these ones? Easy. A flanger, when set to a slow, mild setting, is very close to a chorus. A chorus is very unlikely, on the other hand, to ever sound as ‘jet-engine’-like as a flanger, so you may as well have the pedal that gives you both!

As for the delay pedal, well, I’m of the opinion that a great many gig venues will give your sound a bunch of natural reverb anyway, so adding to it sometimes seems counterproductive. Also, I’ve spoken to more than a few world-class pro players who don’t put reverb on their boards, opting instead for the more controllable ambience of a delay pedal.
With those bases covered, I think you’d be well set up to tackle most gigs.
Less is Sometimes More
This guide is obviously catered to a sort of ‘everyday needs’ kind of pedal use. If you are a fan of Kevin Shields/Mars Volta/The Edge/John Frusciante then you’re probably going to have to face the truth: you need a bunch of pedals!
That said, even these players could probably stick to a small palette of sounds and still bring an equally captivating performance, so it’s that old trade-off of practicality versus compromise. I happen to think that a small, effective pedalboard can really energise your playing, not to mention your gigging experience! If you have the pedals anyway, why not try some of these ideas and see if you can ingest some fresh life into your playing!
Click to View our Selection of Pedalboards