People keep saying that it’s easier than ever to record excellent sounding guitar parts. Technology is more powerful; software is more realistic, and prices are better than ever before.
But is it true? And can this be done on a shoestring budget?
Today, we will answer an affirmative to both of these queries! It is true that you can record truly professional sounding guitar parts in your home, and it need not cost the earth to do so! In this short blog, we’ll outline some of the methods you can adopt to bring your recording goals much closer to realisation.
Whether you have serious ambitions of becoming a visionary producer, or you just want to hear some of your songs recorded finally, it’s time for you to step forward into the world of recording guitars.
We’ll check out a few methods here: using plugins (software), connecting an amp to a laptop and also doing things old-school with a multitrack recorder. Read on to find which method sounds best for you and remember: there is no wrong! This is all about having fun and realising your ambitions.
For Best Results
Central to all modern recording studios these days is, of course, a computer. Most relatively new laptops will be able to serve the function as long as they have at least 4gB of RAM and a pair of USB connections. Lots of pro musicians and producers use Apple MacBook Pro laptops because they are ready ‘out of the box’ to handle some pretty intense processing, but brand means nothing compared with spec and performance. You may well find that the computer you already have is more than up to the job!
We’ll decline any further comment down this Mac/PC avenue since it’s a whole subject on its own (plus it’s boring)! Suffice to say, the more RAM, storage and processing power you have, the better. Take a computer savvy friend with you if you are shopping for a music-making laptop and always read the spec requirements for any software you decide to by.
What is a DAW?
Recording on a computer involves using a type of software called a DAW. This stands for Digital Audio Workstation and is essentially a ‘studio-in-a-box’. We’re talking here about Cubase, Ableton Live, Studio One, Pro Tools and so forth. Each DAW has its own relative strengths and weaknesses so one will likely end up appealing to you more than others.
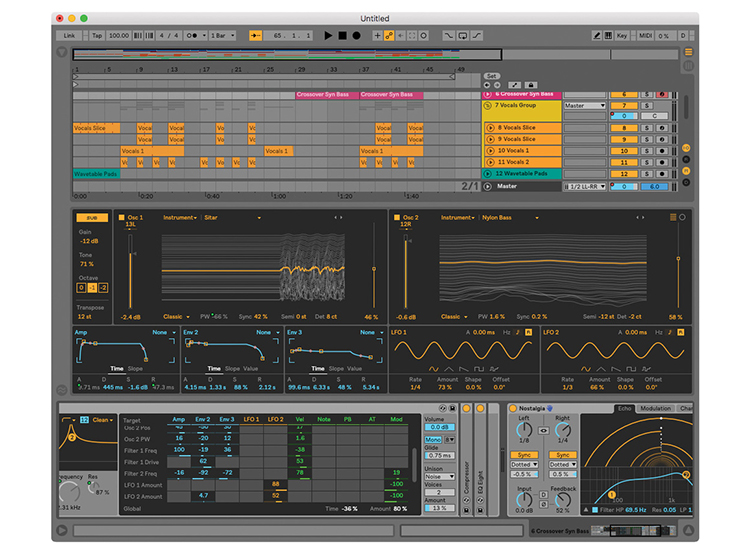
It’s an important subject, because this is the main thing you’ll be dealing with for all of your music-making! For example, this particular writer tried Pro Tools first and had a pretty frustrating, uninspiring experience with it. Ableton Live, on the other hand, was immediately engaging and fun to use. I’ve heard the exact opposite from other musicians. Pro Tools is what you’ll find in most top-end commercial studios, so it mainly boils down to a personal preference. We’ll assume that you will check these out and choose your own favourite: most platforms allow a free trial period so you can have a play around on a few to see which one you prefer before committing to a full purchase.
Audio Interface
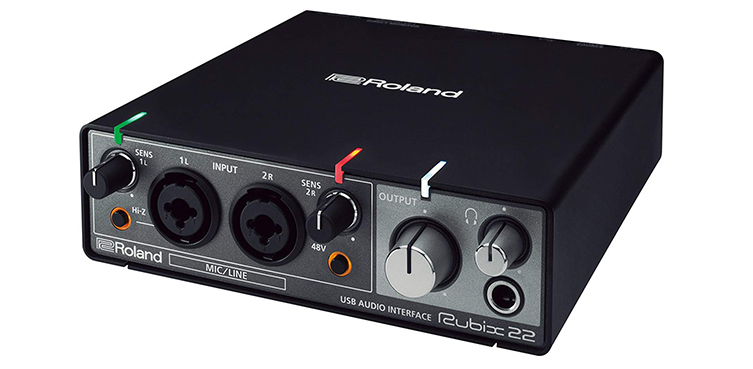
An audio interface is the other significant element of a computer setup. This is a little box that acts as a translator between the audio of your electric guitar (or bass, mic etc) and the binary one and zeroes that a computer understands. You plug your guitar, bass or microphone into the interface’s inputs, which have built-in pre-amps for changing the voltage to a suitable level. These are then converted and sent via USB or Thunderbolt to your computer. If your mic needs ‘phantom power’ (extra voltage to make the workings of the mic do their thing), the interface will more often than not supply that, too.
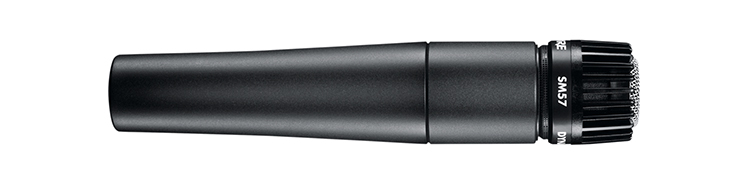
On that subject, it may be worth understanding that 'dynamic' mics do not require the +48v that phantom power provides in order to work. Most, though definitely not all, mics are either dynamic or condenser in design. This goes somewhat beyond the scope of this blog but knowing about it at least is a start. Dynamic mics the type you'll find in rehearsal room and gig venues for using with vocals and guitar cabs. Dynamic mics are generally cheaper than condensers so investing in something like a Shure SM57 will be a good buy for using with guitars and vocals. You'll always be glad that you had one handy, even if our guide today does not require it!
Going back to your interface, it will have controls on the front for setting levels, as well as providing ‘soundcard’ duties by being the place to plug your headphones or studio monitors into. As this point, any low-cost headphones will do the job just fine. Spending more will get you a better sound to mix from, but headphones can be upgraded as funds allow: this blog is designed to get you moving!
Have a look at all of the interfaces available since each one comes bundled with DAW software to one degree or another. Some popular interfaces include the Presonus Audiobox USB, the Focusrite Scarlett 2i2 and the Roland RUBIX22. For ultimate value, have a look at the Behringer UM22!
We would share that quality can vary pretty wildly with interfaces though, and we do recommend buying the best one you can afford. This is helpful advice rather than thinly veiled sales talk: we've been stung in the past ourselves with cheap 'n' cheerful interfaces! If in doubt, do some research and talk to our staff!
Plugins
You’ve loaded up whichever DAW program you’ve gone for (trial or otherwise) and you’ve selected a track to record on. Plugging your guitar into your interface will let you hear the guitar coming though the computer and out your headphones or speakers. Success! But it doesn’t sound like much, right? Not exactly a roaring rock sound, is it?
No problem, you just need some plugins to use. A plugin is a piece of software that affects a particular track within your DAW. Adding a reverb to a recorded vocal track involves using a reverb plugin, for example.
The same is true of guitar sounds. Lots of companies have made their own versions of amp and effect simulation, generally with visual recreations on-screen of all the amp models and so on that you’ll be using. One of the most famous and successful of these is Guitar Rig, a plugin from Native Instruments. From one program, you’ll get access to the sounds of a whole room full of classic and modern amps, multiple cab options and plenty of recognisable FX to create virtual chains with. It’s just like in real life, except it’s happening within your computer and displaying on your screen.

The realism is uncanny, making top-quality guitar tones available to you at the click of a mouse. These sounds are fully ‘produced’ too, so they sound great straight away and require very minimal, if any, adjusting. This all helps you get things sounding great without prior knowledge of all the arcane secrets of EQ’ing and mic positioning. Phew!
The best news is, Native are offering a FREE ‘lite’ version of Guitar Rig alongside lots of other slimmed-down versions of their software as part of the Komplete Start pack. Simply jump onto Native’s website and download these free sounds for nothing! Obviously, you don’t get every model and feature (the Guitar Rig available here only has one amp, a ‘British’ head called ‘Jump’, if you can work out the reference!), but as a no-risk entry point to the world of plugins, it’s unbeatable. This is the best stuff out there so it’s well worth taking advantage of. You get synths and other instruments too! When the times comes to expand and upgrade the software, we sell Native’s Komplete collection in a variety of packages.
Most of the interfaces we mentioned earlier come bundled with a software package that includes a selection of plugins, so you’ll be sorted for sounds either way. Native are not the only guys doing this, so there are options. Experimenting with keyboard sounds is easy too: even if you don’t have a USB keyboard controller, you can set the software so that your regular laptop’s keyboard (i.e. the one you type words on) can double up as keyboard keys.
USB Amps
Digital amp modelling is not just the domain of software plugins. For the last decade or two, amp brands like Line 6, Roland, Fender and Blackstar have used digital technology to bring amazing, authentic guitar sounds to players through small practice amps. You may well already have one of these amps for playing in the house!
If you do use a digital practice amp, check around the back panel and see if there’s a USB connection. If there is, you can plug your amp directly into your computer via USB and record the sounds of your amp! No mics, no fiddling around: it couldn’t be easier! You’ll be able to use the sounds you are already familiar with, too.
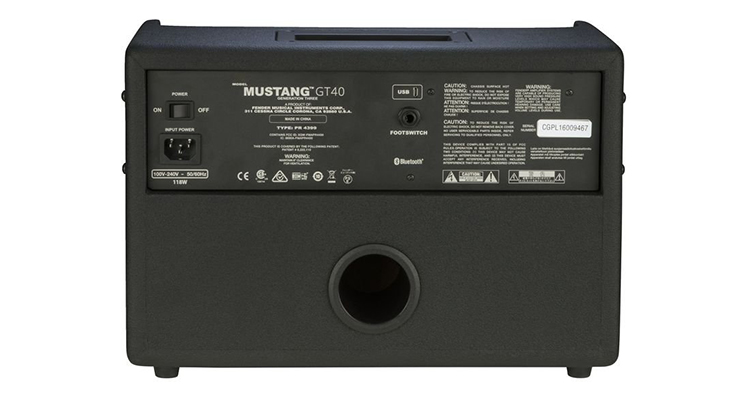
The rear view of this Fender Mustang GT digital map clearly shows the USB connection above the footswitch jack.
Some amps without USB still have a ‘record out’ ¼” jack output. These use amp simulation technology to allow you to still take advantage of direct recording. It’s a different way of doing the same thing, but instead of plugging straight into your computer via USB, you connect the amp to your interface with a regular guitar cable.
Another similar option would be a multi-FX with amp simulation. Most multi-FX processors today have USB outputs for direct recording. Boss, Zoom and Line 6 all have excellent units with powerful and realistic sounds. As with the amps, connect these to your computer and select them as your interface to allow you access to yur unit's tones directly through your DAW.

This low cost Zoom multi-FX has a USB connection for easy connecting to your computer.
No Computer
There are still lots of players out there who’d like to hear recordings of their playing but get daunted at the notion of using a computer. We fully understand this! Even though we record music with computers every day, it can be a trying process!
In this scenario, we recommend checking out multitrack recorders. These are digital versions of the old cassette four-tracks you may have used back in the day. Brands like Tascam (the old favourite), Zoom and Boss still make plenty of these devices and they are pretty simple to work with. Depending on your ambitions, you can go for something large like the 32 track Tascam DP32SD, or if you are just dipping your toe in the water, you could take a close look at the small, affordable and massively popular Zoom R8.
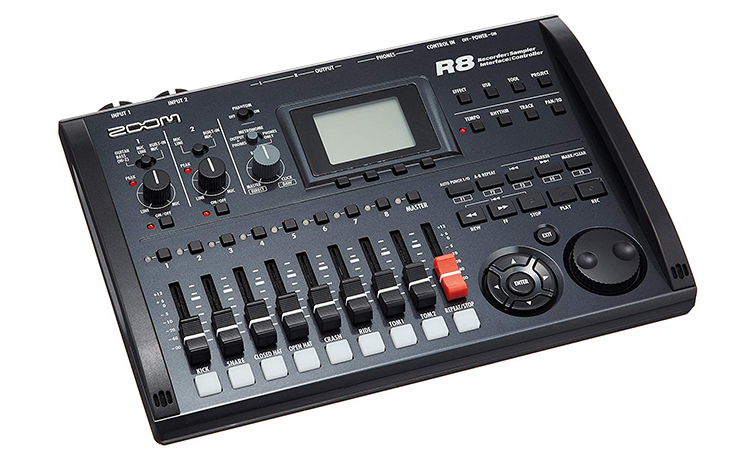
A portable digital multitrack like this Zoom R8 makes recording easy for everybody.
Many of these products also double up as an interface: this means you can still use them to connect instruments and mics to a computer if you decide to go that way. This makes these devices a pretty safe purchase! The Boss Micro BR and the Zoom R8 both have built in drum features too. Bear in mind, you’ll have to factor in the cost of at least one microphone to use when mic’ing up your guitar amps.
Monitor speakers and headphones can be used to listen back to your recordings, just the same as with an interface. These units save your songs to SD cards, the type you’d use with a camera. If you want to put your music online to share, you’ll still need to use a computer, but the rest of the process can be accomplished without switching on a laptop.
Recording on a digital multitrack is good for people on the move (no need to carry an expensive laptop), rehearsals and jams, and, as we noted, for musicians who are not quite up for dealing with the learning curve of computers and software.
Tips to Get You Started
So, you’ve chosen the path you want to go down, you have your equipment and you are ready to actually record. Here are a couple of beginner’s tips to get the best sound from your guitar performances.
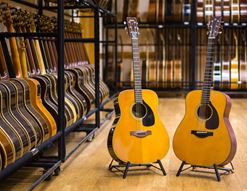
Double your rhythm parts: whether this is acoustic guitar or heavy electric riffs, playing the exact same part on two separate tracks, then panning them left and right will make your recording sound more professional and sonically impressive. Practice to get your performance as tight as possible: the idea here is to create the illusion of one powerful sound, rather than two slightly out of time guitars!
Panning: you have a full stereo spectrum to play with so place your guitar parts accordingly. The human ear gets a little tired of elements that are placed at extreme left and right so save that space for sounds that come and go. For your main rhythm guitars, try panning fifty left and fifty right (or 9 o’clock and three o’clock if you are using control knobs). This will create the illusion of space whilst still meshing the tracks together somewhat. Vocals, bass, kick drum and snare drum traditionally sit in the middle of the spectrum (i.e. zero, neither left or right) but rules are made for breaking! Experimentation is fun and could result in some great recordings.
Remove bass frequencies: even for the heaviest of Metal guitar parts, you simply do not need huge amounts of low end in your guitar sound. All these frequencies do is rob sonic space from the bass and make your recording sound muddy. Keep your guitars lean by cutting out anything that is 40hz or below. Do this by using an EQ plug in, or simply turn back the bass on your amp/amp sim/multitrack EQ section. It’s all about the big picture here, so tightly played rhythm parts will sound much more effective and sit much better in an overall mix than gigantic guitars that eat up every frequency.
Divide your parts up: you may be used to playing through an entire song in one pass, switching pedals off and on, but this is not how to approach the recording. Keep clean guitars separate from distorted ones and have any lead or solo parts on separate tracks again. The reasons for this are clear when you hear them: clean sounds can sit elsewhere in the mix (pan them further out or closer in than your heavy tracks) and require different EQ tweaks than distorted guitars. Levels can also be adjusted with more authority, helping your sounds sit together better. Finally, solos are special moments and should sit in the middle of a mix, often with certain frequencies boosted and compression applied from a compressor plugin. None of this can be done if your solo is on the same track (i.e. same performance) as one of your rhythm tracks.
Less gain on rhythm parts: we promise that this will almost always result in a better, more effective recording. We don’t mean clean things up, we just recommend turning the gain back a notch or two. Try it and see for yourself!
Final Thoughts
We hope this brief run-through has helped sort some things out in your mind. If you are new to the world of recording it can be bewildering and daunting. We don’t want this! You may well have written some of the best songs in history: what a travesty it would be if we didn’t get to hear them?!
It is definitely true to say, as we have seen, that recording professional sounding guitar parts has never been simpler or cheaper. Technology has really levelled the playing field in the musician’s favour. There has never been a better time to get your songs down ‘on tape’, as it were!
Recording is great fun and all of the above methods will have you sounding like a pro without the associated headaches and empty wallet! Jump in, express yourself and have fun! As always, thanks for reading and I’ll see you for our next blog.