Welcome back to our guide on how to look after your guitar! Part One and Part Two dealt with more simple situations such as cleaning your guitar and accounting for the different temperatures and conditions brought on by the changes in seasons. If you’ve not read those articles yet, click those links above and we’ll see you back here when you’re ready.
Today, for our final part, we’ll take a brief look at some of the simpler things you can do in terms of a set-up, to ensure that you’re getting the best from your guitar. Jog back to Part 2 for a list of simple tools you might want to have handy. This is all good, straightforward stuff that you can learn and take forwards with you, so let’s get to it!
Disclaimer
Before we go any further, we’d always recommend getting a qualified guitar tech to look at your guitar every once in a while. Having a professional eye-up and sort out any niggles is key in maintaining a long, happy life for your guitar. Today’s blog is about taking control on smaller issues: it’s neither an exhaustive guide to all points of guitar maintenance nor is it a replacement for a professional’s assessment. Exercise caution with every process you apply to your guitar, and if you have any hesitations at all, then quit and take it to your local tech. Okay? Good, let’s see what we can do today then!
The Quick, Easy Check & Fix
The quick, easy check & fix is all about casting a glance over the areas of the instrument you routinely come into contact with, and making sure everything’s tight. You’ll also have a look at the neck for bowing, but we’ll get back to that.

For now, check out the strap buttons and make sure they are nice and tight. If they are loose, grab a star-headed screwdriver and tighten them. If they remain loose, here’s a fix for you:
- Unscrew the strap button and take it off completely
- Grab a normal, everyday match, break off a length of the matchwood, maybe a third of the match’s length
- Stuff that wood into the hole where the strap button goes
- Put the strap button back in, tighten it up and enjoy the feeling of satisfaction you’ve gained from fixing the problem! Your strap button should now be tight and secure!
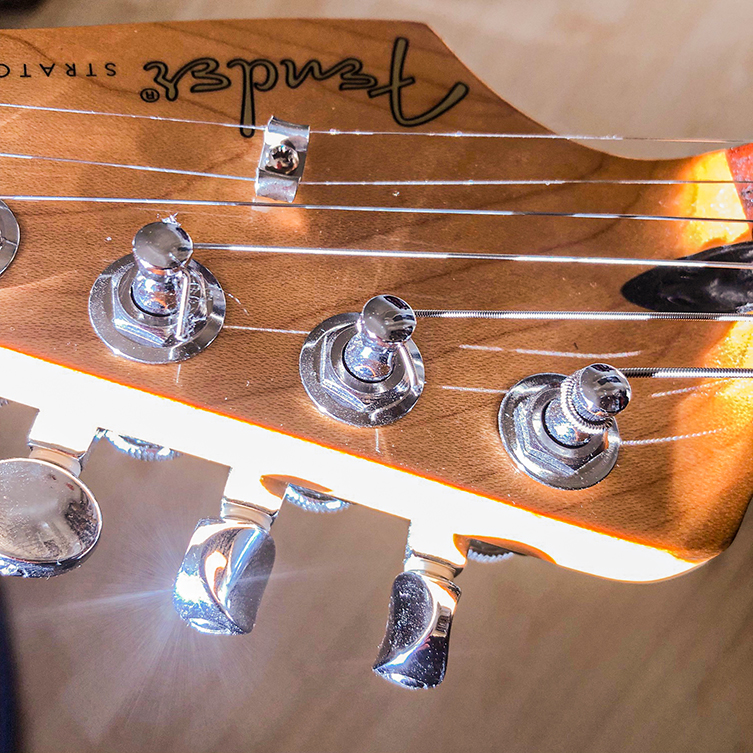
Whilst you have the screwdriver there, inspect your tuning machine heads to see if they need tightened. Now, do beware, because many types - including Grovers - use the screw at the top to adjust the tension of the mechanism, so don’t tighten that unless you feel like the tuner is performing less well than its siblings. Hand tighten the tuner’s thin little nuts on the face of the guitar’s headstock. They come loose through use, so just turn them clockwise until they are tight.
This same principle applies to the input jack, too. They are notorious, particularly on new guitars, for working themselves loose. Left unchecked, you can suffer embarrassments such as the lead falling out, the jack parts falling out, or indeed falling inside your guitar. All of these things are a headache and will rob you of all of your hard-earned cool points, so make a habit of getting these parts tight, without going crazy. It’s like a handshake: firm, but not into the realms of some sort of overcompensating iron grip.
Lemon Oil
Have a look at your guitar’s fingerboard. If it’s maple (light blonde colour) or ebony (normally very dark brown, almost black) then skip this part, because those timbers do not require a drink of lemon oil. If, however, it’s brown in any sort of general way, then it is likely to be made from rosewood or something in that general area, like pau ferro or Indian laurel. You’ll notice that the wood is porous - in other words it has a slight nature texture that isn’t just flat - and therefore will need the occasional dosing with lemon oil.
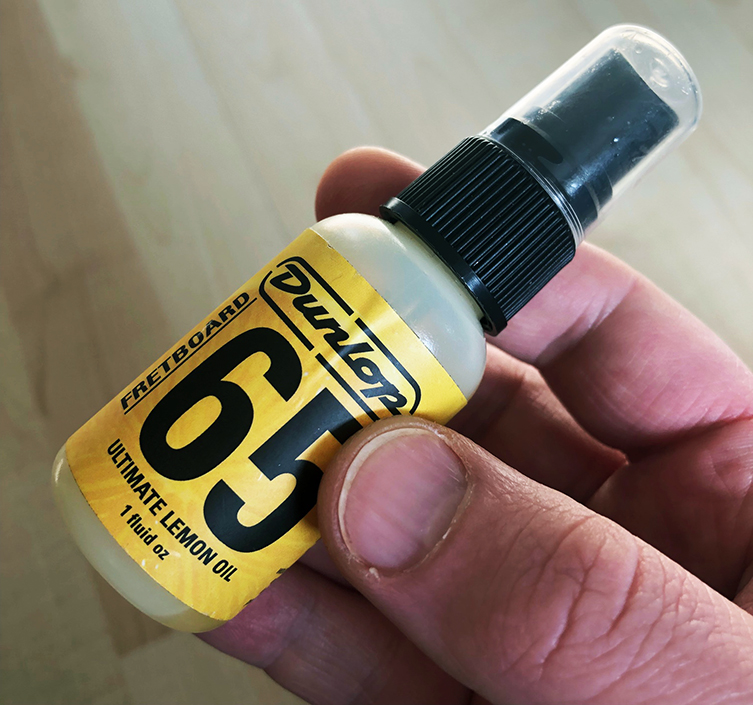
Now, let’s not be inversely generous here: you do not need to do this very often and you do not need to pour on loads. As with using hair products or putting flavoured syrup in your fancy coffee, a little goes a long way. This task should be performed when changing guitar strings (cheapskates will end up with slippery gross strings so just invest in a new set), and definitely NOT every time you change strings! We’re taking about lemon oiling a fretboard maybe twice a year, three at the most, if the board’s wood looks drier and lighter in colour than you remember it.
Here’s what to do:
- Remove the strings altogether
- Spray a small amount of lemon oil on the fingerboard in a few places. Grab a clean rag and gently use it to cover the wood with the oil. Don’t rub it in just now, just make sure you’ve covered the board
- Stick the kettle on
- After 5 minutes, take that rag and rub the oil into the fingerboard
- Get a piece of kitchen roll and wipe off the excess oil
- Restring with lovely fresh strings
That’s it! Your fingerboard will now be thoroughly pleased with you for giving it a good drink, and it’ll look and feel at its best now. Remember, not too often!
Tweak Time
So, that’s all the superficial stuff dealt with, but what about making adjustments? Let’s say this first: if you enjoy how your guitar is currently playing, then you might not need to make any adjustments! However, things like high action (the strings being far above the fingerboard) and poor intonation (string not making the correct pitch at the correct place) can really ruin the whole experience of guitar playing, so we’ll look into these a little today, amongst some other things.
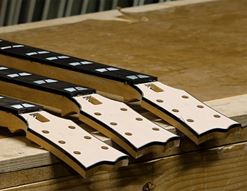
Truss Rod
The first thing to check out is the bow in the neck. Remember we mentioned earlier about how we’d be coming back to this? So, with a guitar neck, it can be concave, flat or convex. These descriptors relate to the shape of the neck’s overall ‘behaviour’ along its length: two of them are not what we want today! A flat neck is difficult to work with unless you enjoy a particularly high action, and a convex neck (or backbend) means that the neck is bending backwards slightly along its length. That is hardly conducive to a good playing experience, since all of the strings will land in the wrong places when you fret some notes! You’ll ‘fret-out’ all of the time and sound like a loser. This is to be avoided.
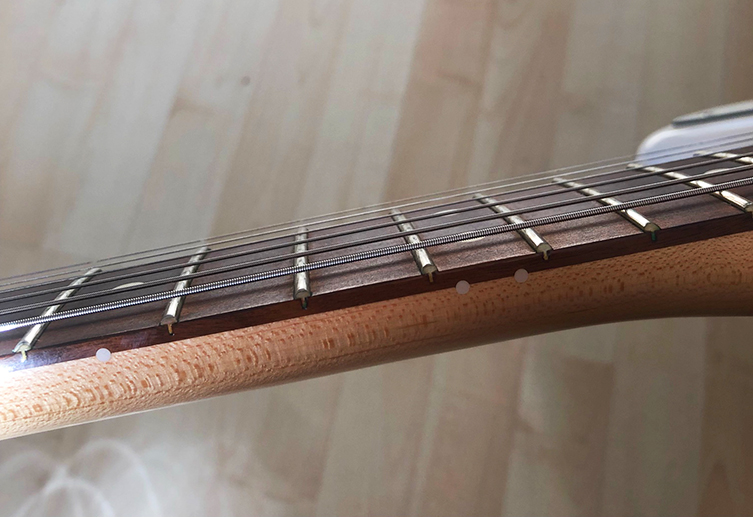
What you want is a very slight forwards bend - or bow - in the neck. Too much will be horrible to play on (and not great for your guitar’s health) but none would be just as unpleasant to play on. We need a little bit of a bow so that the straight strings have somewhere to go when we press down on them. All good so far?
Okay, let’s press on. The first thing to do is to visually assess the situation. Actually, the first ting to do is to tune your guitar! Once that’s done, have a look at the neck side-on (from playing position, basically) and compare the straightness of the strings with the bow of the fingerboard. If there is a very shallow bow, you’re good! Move on! If there’s a pretty big space between the tops of the frets (it should be relatively obvious, to be honest), then you may need to adjust the truss rod. You can also gently press down on the strings until they reach the frets. How much distance your finger has to travel will tell you plenty about how much space is there. (Also, if your notes are exceedingly buzzy, then you’ll most likely need to introduce a little relief to the neck, which means bringing the bow shape to it a little).
A truss rod, without getting bogged down in details, is a long metal device that is fitted inside the length of your guitar neck. Its job is to provide a level of adjustable stability where it is needed the most. Wood often shifts and moves due to all of the environmental aspects we looked at in part two. The truss rod can correct those shifts by offering an opposite ‘force’, for want of a better term. If your guitar neck is too heavily bowed, then tightening the truss rod will straighten the neck somewhat, correcting the problem. By the same token, if there is back bow or just too much flat straightness in the neck, then loosening the truss rod will introduce some ‘relief’ and cause the neck to bow in that very minor way that is ideal.
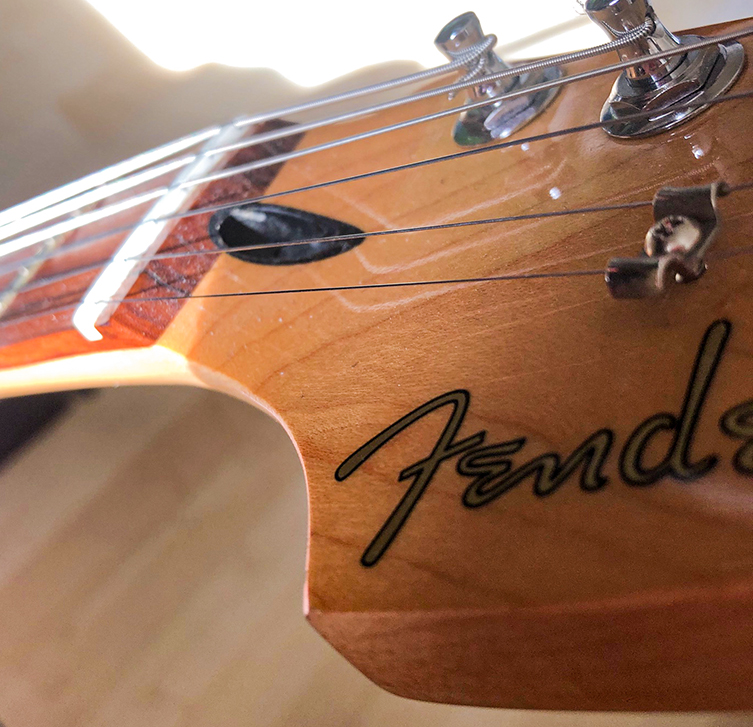
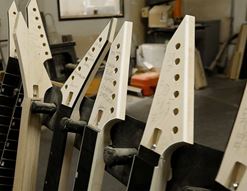
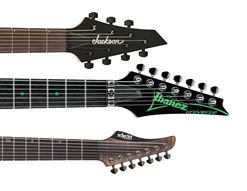
Okay, so the truss rod is inside the neck: how do you gain access to it? Well, it actually depends on your guitar, annoyingly. Your guitar’s truss rod will be adjustable from one of a number of places, and some are easier to reach than others. If it’s a contemporary Fender (i.e. not one of their reissues) or Gibson, PRS, Ibanez, Epiphone, Jackson (most guitars, basically) then you can get to the truss rod up at the headstock, in a little area just after the nut. Gibson and many other brands cover theirs with a - you guessed it - truss rod cover, and Fender just leave theirs open to the elements, as it were. Vintage Fender guitars are trickier, because there is no way to get at the truss rod without literally removing the entire neck. Once you take the neck off, the rod adjusts from the opposite end, underneath the highest frets. If that sounds like a hassle, well, we’d agree with you!
The main other type we readily find is in a similar place to the vintage Fender style, but with an accessible area visible to us just between the last fret and the neck pickup. You’ll see this type of truss rod adjuster on Music Man, EVH, and some others. It appears as a wheel, and is something we wish all guitars had. They don’t! Let’s move on.
Adjusting the Truss Rod
So, we’re located the truss rod and are ready to adjust it. How do we do this? You’ll need a tool, and that tool will depend on the truss rod (sorry!). In most cases, it’s an allen key you'll require, and it’ll be either Imperial or Metric in style defending on your guitar’s country of manufacture. Just do what we do: try a bunch until you find one that fits, use it, and then promptly forget which one it was next time you need it!

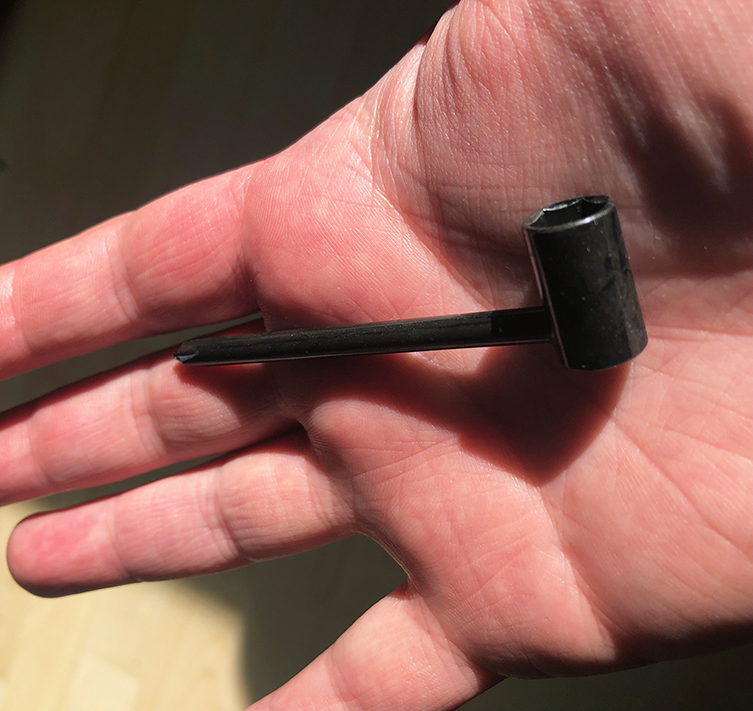
The only major differential is with Gibson, who have a totally different style and thankfully supply their own truss rod adjustment tool with every guitar. It looks like Popeye’s pipe and we hope you haven’t thrown it away, because now you need it!
Once you’ve sussed all that, make ¼ turn adjustments in the appropriate direction. Looking down the guitar from the headstock, a right turn will tighten while a left will loosen (Righty-Tighty, Lefty-Loosey!), so make a quarter turn right if your neck is too bowed, and the opposite way if the neck needs relief.
After every adjustment, retune your guitar and give it a few minutes for the wood to settle. We do say to exercise caution with the truss rod, but common sense will see you right. Don’t overdo it, but by the same measure, don’t be afraid to tackle it, either. Unless you lose the plot, you’re unlikely to go too far, but we’ll remind you: small steps, with retuning and checking at every point! You’re aiming for the neck to have a very slight bow and nothing more.
Intonation
What is intonation and how do you check for it?
Okay, intonation is when the note you play is the pitch it’s supposed to be, rather than flat or sharp. If you play a ‘D’ note, say, at the fifth fret of the second heaviest string, you want that pitch to actually be ‘D’ and not a close but slightly ‘off’ version of that D. With us?
So how do you check this? And how do you sort it if it’s needing some attention?
Thankfully, these are easy tasks. Grab that tuner that you own, and play a 12th fret harmonic on each string of your guitar, one string at a time. What’s a 12th fret harmonic? It’s where you lightly touch the string over the 12th fret (the metal fret, not the wood where you put your finger to make the note) but don’t press down. Plucking the string will make a high-pitched note sound: this is a 12th fret harmonic, and it’s the same note as the open string, it just sounds exactly one octave higher.
So, play that 12th fret harmonic and watch your tuner. If the tuner reads the note as being in tune, then that string should intonate fine across the whole spectrum of frets. Happy days! Now do the same for each subsequent string. If all of them are ringing true to pitch, then your intonation is grand and you can move on from this step, happy in the knowledge that your guitar is sounding mega. If not, then you have an issue with intonation.
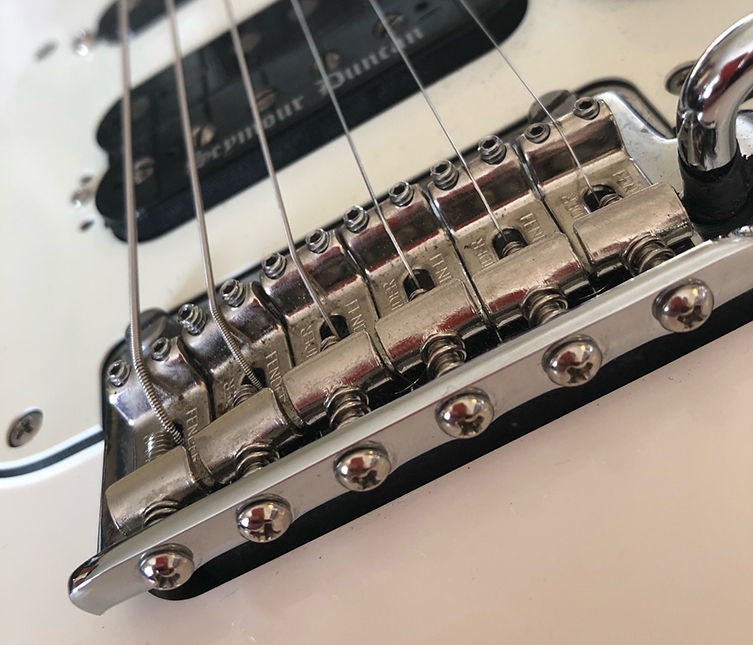
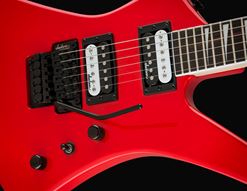
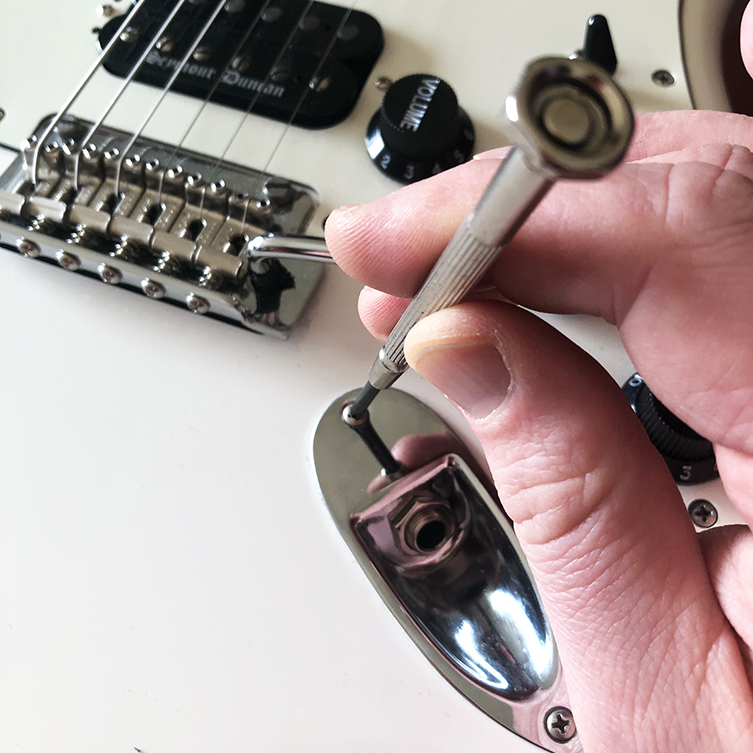
Relax! It’s an easy fix. Look at the bridge of your guitar, and inspect where the string sits. This part of the bridge is called the saddle, and it’s normally adjustable from the back with a star-headed screwdriver (if you have a stratocaster or telecaster-style guitar) or from the back of the bridge with a slot-head screwdriver if you have a Les Paul/SG-style ‘tune-o-matic’ bridge. The individual string saddles can be adjusted forwards (towards the pickups) and backwards (away from the pickups) to help compensate for intonation issues. So, if your 12th fret harmonic indicated a little sharp - that, is, higher than the centre - then you need to effectively shorten the string’s travel by adjusting the saddle forwards, towards the pickups. Just try a little, retune the string and sound the harmonic again until your tuner hits the centre mark.
If the harmonic sounded flat - that is, lower than centre pitch on the tuner’s display - then that saddle needs to go back a little bit until the harmonic sounds exactly in the middle of the tuner’s display, just as before.
Do this for all of your strings, and remember: a little adjustment goes a long way on the saddles! It’s easy and you’ll be done in a few minutes.
Saddle Height
You’ve checked/sorted your truss rod, and your made sure that the intonation is fine. If you feel that the strings could still come down a bit, then you can adjust the saddles in your bridge. You are now familiar with the saddles, since you’ve just dealt with them, so lets return to them and see how to finally sort out that ‘action’ so that the strings are easy to play and fret.
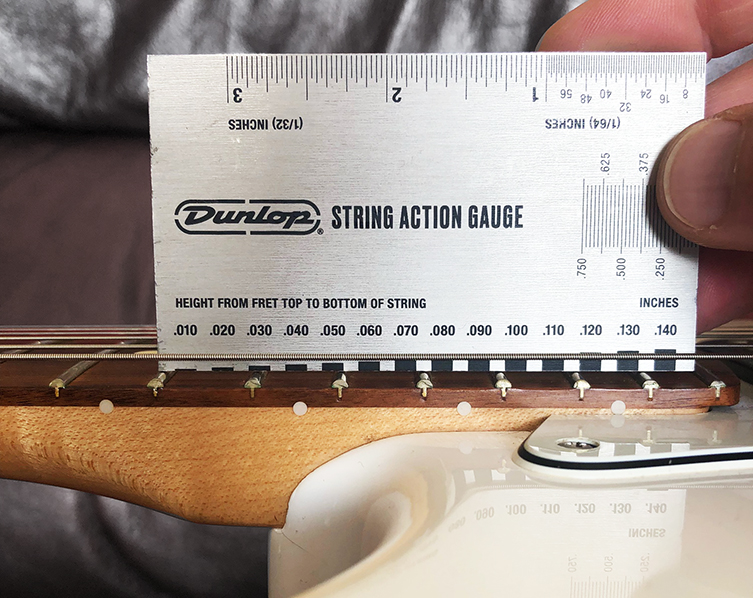
You can eyeball your guitar to see if the action is low or high much like before, but this time, see how much clearance there is around the 17th fret, from the bottom of the string to the top of the fret. Get your string gauge or ruler and measure this distance. Fender’s official guidance, by way of example, states that a distance of 1.6mm (or 4/64”) is how they set up their guitars at the Fender factory. Aim for this as a starting point, but realise that being on either side of that number is fine if it feels fine to you!
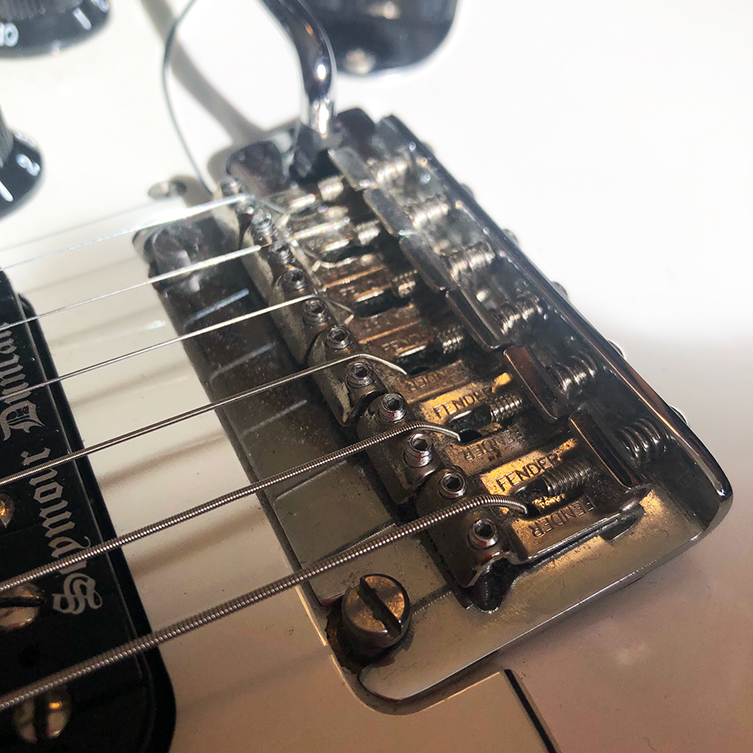
Depending on what type of guitar you have, you can then adjust the string height accordingly, using a small allen key in most cases. For Strat/Tele types, each bridge saddle will have two allen key points on top: turn these an equal amount of times to raise or lower to your preference. Guitars with Gibson or Epiphone style bridges tend to work by raising or lowering the full bridge using special wheels that sit under the bridge posts. As always, make small adjustments, retune the guitar and have a look at your progress: easy does it!
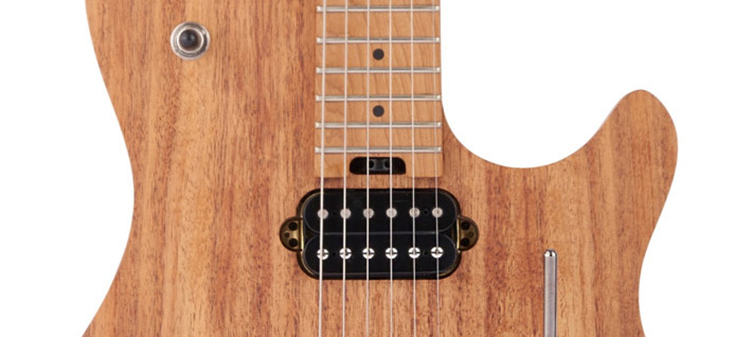
Pickup Height
The height that your pickups sit in relation to your guitar strings can play a big part in your sound. It’s a very overlooked part of the puzzle, so let’s address that one today!
The magnets inside every pickups pull on the metal of your guitar strings. It’s physics, and it’s unavoidable. It’s also hardly a problem, but you should know when the pickups are starting to become a problem for you, so you can eliminate this from your ongoing tone quest.
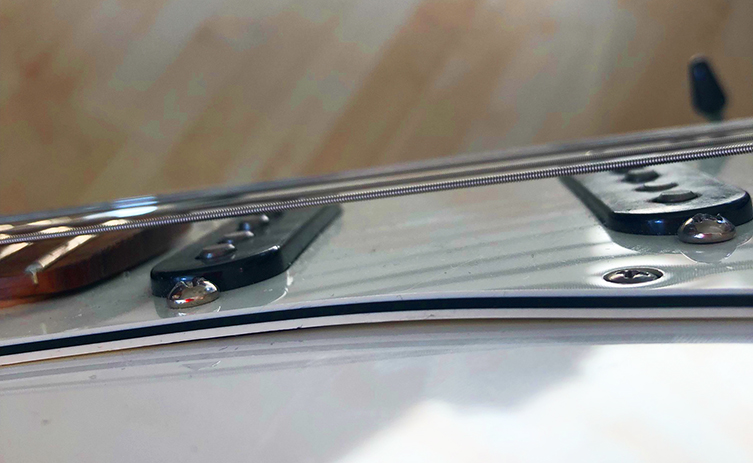
There will definitely be a height in which your pickups sound better to you. The closer the pickup is to the string, the greater the output will be, but also, the greater the magnetic resistance. Yes, putting the pickups up as high as they can go will give you maximum output, but what are we? Schoolkids? SInce when was that ever the goal? We want ot sound as good as possible, and in this case, that doesn’t mean as loud as possible. Pickup magnets can absolutely interfere with the natural movement and vibration of a string, particularly super powerful pickups (EMG’s, Fishman Fluence, Seymour Duncan Invader etc etc) so we propose a different tactic.
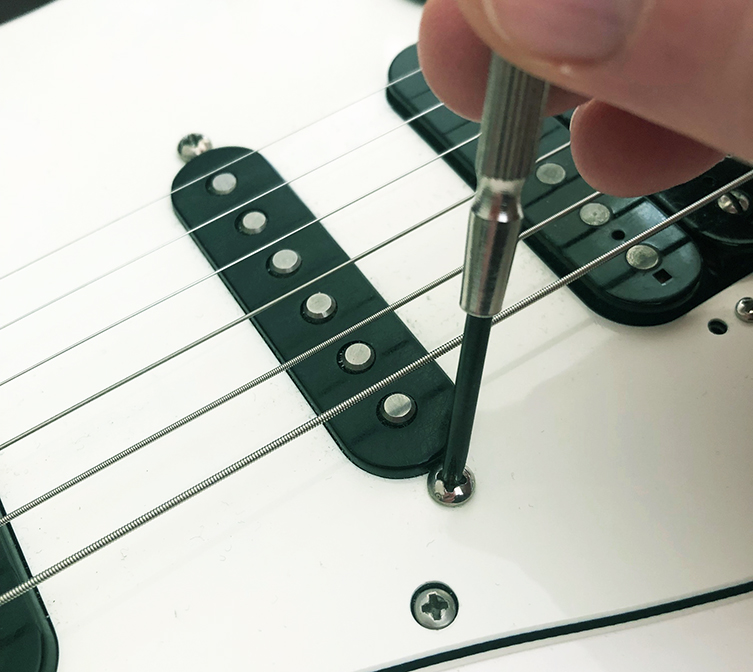
Grab your trusty, tiny star-headed screwdriver and screw down your pickups until they are close to the guitar’s body. Far away from the strings, okay? Now, have you tuned up? Why not? Okay, tune up and plug your guitar into your amp, or indeed your interface or modeller. Get a nice clean tone ready, basically, and then adjust the pickups back up the way in small increments, playing as you go. By continually playing and adjusting, you are using your ears to decide when things are sounding good, rather than your eyes or indeed your ruler.
Bridge pickups often have different output levels to neck units, and part of that is because the strings move more around towards the middle of the guitar, creating more output. Guitar makers sometimes compensate by making the bridge pickup ‘hotter’, thus bringing balance overall. In this context, it means you shouldn’t be trying to visually line up the heights of the pickups: just use your ears let them guide your hands!
Make Some Noise
Okay, that pretty much wraps things up here, folks! We’ve check out how to take care of everyday maintenance, and we’ve delved into some of the secrets of guitar setups. With this info, you’ll have some agency about what to do when things start feeling less amazing than they once did: it’s natural for guitars to slide out of whack slightly over time, so this is why we learn this stuff!
Now, before we go, we’ll remind you once again of the three golden rules:
- Tune your guitar before and after every adjustment! Is it in tune? Don’t guess! Tune it!
- Carry out every process in small increments, and check tuning and feel as you go. Baby steps!
- If you’re unsure, or feel like you’re out of depth, just stop and take it to a reputable tech. Better ot get an expert eye on things. You can always pick up on this afterwards! If you’re feeling overwhelmed, do as above. This is all about getting your guitar feeling and playing brilliantly, so let’s not lose our heads, ok?
And on that note, it’s definitely time for you to plug that guitar in and make a noise. What on earth are you waiting for?