Are you looking to create a pedal board setup? Could this be your first pedal board? Sounds like you could use some pointers, and I am here to gladly pass on what I know.
I think the road ahead to begin sensibly, with a moderately-sized pedal board that’s loaded up with a handful of quality compact stompboxes, and all powered via a power supply. Since this is your first pedal board, I want price to be a factor I consider, so there needs to be great value here, but I also want to select pedal for you that will last: these will be keepers! Sound good? Then let us begin by laying out my step-by-step approach:
How to Build a Pedalboard
- Choose a versatile set of pedals
- Order and connect your pedals
- Find the right sized pedal board
- Purchase a pedal power supply
- Mount your pedals to the board
These are the main points I aim to hit with you today on how to set up your pedalboard. I’ll talk about pedal brands, power supplies, voltage, current and patch cabling as I go along. Any questions at the back? No? Good: onwards!
Contents
- Choose a Versatile Set of Pedals
- Order and Connect Your Pedals
- Connecting Your Pedals
- Finding the Right Sized Pedal Board
- Patch Cables
- Purchase a Pedal Power Supply
- Pedal Voltage, Current & Polarity
- Mount Your Stompboxes to Your Pedalboard
- Well Done: You Have a Pedal Board!
Choose a Versatile Set of Pedals
This first one is really up to you, isn’t it? What do you want to do with your sound? Are you looking to have access to a nice palette of sounds that will carry you through innumerable styles and gigs? Or are you seeking to utterly transform your guitar’s tone into something unrecognisable? There are pedals out there for both of these goals, make no mistake!
Today, however, I’m going to reign in my more antisocial sonic desires and instead work with you to create a ‘Swiss Army Knife’ pedal board: a set of adaptable sounds that will serve you well wherever you travel, musically.
What effects are going to make it onto the board? Why, these:
Tuner Pedals
The only pedal here this is non-negotiable in its inclusion is a tuner pedal. Get a tuner pedal. It doesn’t have to be an expensive one, but with pedals (as with many things in life), spending more with buy you better quality. ‘Quality’ here doesn’t mean tuning accuracy so much as transparency: you don’t want your pedals to leave any sonic trace of themselves on your sound when they are switched off, which some pedals do.
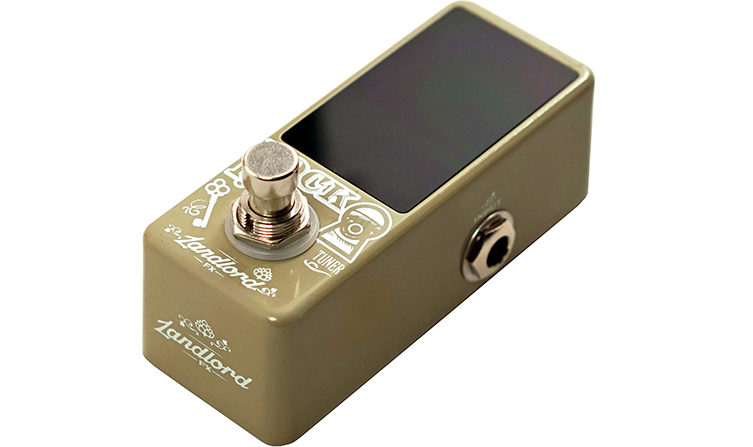
For a cheap choice, try the Landlord Lock In tuner. This pub-themed pedal is cheap and it is small, both of which are very welcome on our pedal board! The display is nice and pig though, so you should be able to read it without any problems, even on a dark stage.
The other choice I’d recommend would be the industry standard BOSS TU-3. It’s rock solid, does it’s job well, and has another trick up its sleeve that I’ll come back to later.

Even if you have a clip on tuner for using in the house, do everyone a favour and get a pedal-based tuner on your board. Nobody wants to hear you tune up (pedals will normally mute your signal when they are turned on) and nobody wants to see that little clip on tuner hanging off the end of your guitar’s headstock. You get minus Cool Points for this, and rightly so.
Overdrive/Distortion Pedals
The category for overdrive and distortion is perhaps the widest in the whole guitar pedal market. Every pedal builder has their own selection of overdrives (light amounts of gain and drive), distortion (heavier amounts of drive), high gain (metal-levels of gain) and fuzz (a different style of gain, so think ‘Jimi Hendrix’), so which do you buy?
Well I would perhaps stick to the classics here. Top pedals brands include BOSS, MXR, Ibanez, JHS and maybe a few other specific brands.
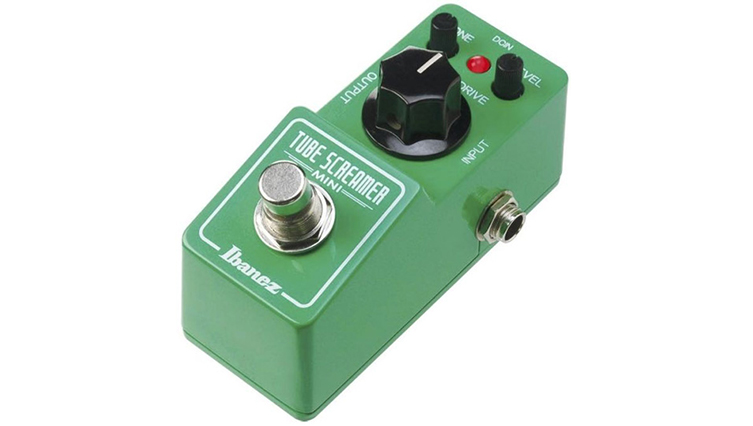
TheIbanez Tube Screamer is a legendary overdrive pedal that offers low to mid-levels of gain, and just has a very pleasing sound that loads of playings love. It comes in a few styles, and I’d say the TSMINI is your top choice here. You get that classic ‘TS808’ sound (that’s a particular model of Tube Screamer) with a smaller footprint, so again you can save space on your pedal board.
For a harder sound, you’ll also need a distortion pedal. The TSMINI will go so far, but for full-on rock sounds, well, more is more. Now, distortion pedals can really vary in price, and the price hardly ever reflects ‘better’ or ‘worse’: it may do with other types of pedal, but with distortion, your own taste is the key here.
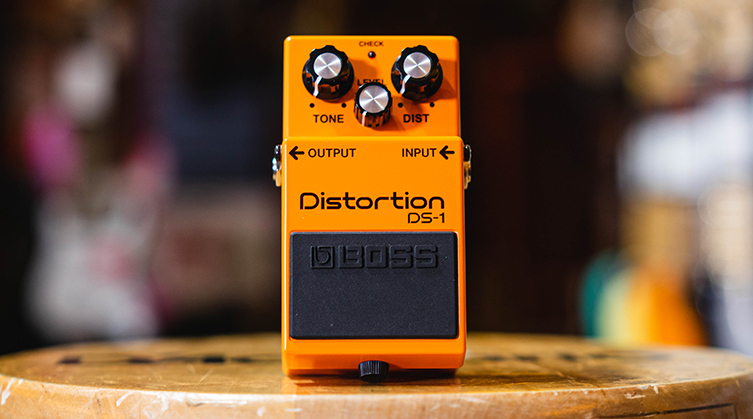
That said, the BOSS DS-1 is one of the most popular pedals in the world for good reason! If Nirvana and Joe Satriani both use one, then you can be sure that the sounds are up to snuff! Personally, I’d turn that Tone control almost all the way to the left (i.e. off) but you’ll play around with it when you try one for yourself.
JHS are a boutique (handmade and therefore expensive) pedal brand from the USA. Normally, I’d say that their pedals are being the price brackets of a ‘first pedal board’ article like this, but their 3 Series is actually pretty affordable, considering they are still made in the USA!
Their whole range sounds excellent (you could popular your whole pedal board with these and you’d sound awesome, but that’s not much of a blog, is it?) so we want to choose their 3 Series Distortion, since it is very adaptable for different styles.
Delay Pedals
Delay is, in my opinion, one of the most important effects a guitarist can have in their palette. Delay and reverb (which we’ll be looking at next) are both ‘timed-based’ or ‘ambient’ effects, since they add the notion of space and atmosphere to your sound.
Delay creates echoes of what we’ve played and is a highly musical and useful sound. Some delay pedals can get pretty complex in terms of the options and parameters, so I’m voting to go simple and choose one that sounds good and is easy to operate.
Landlord FX save the day once again with a unit that’s cheap, available and does the trick. The Landlord Taproom is straightforward, with three control knobs, and is a great introduction to the subject of d-d-d-d-delay.
Reverb Pedals
Reverb is the other main type of time-based effect. In short, Reverb just makes everything sound super dreamy. It sounds like playing live in a very large room that has the best natural acoustic properties in the world. Unlike a delay, there is no definite ‘echo-o-o’ and more of a ‘tail’. We won’t get too technical, but simply a reverb pedal creates a sonic environment (or sense of space, if you prefer) around your notes, making them sound all ambient and distant. Something like the Walrus Audio Fundamental Reverb is a great place to start for all those dreamy tones. You can achieve the perfect level of reverb you wish with this little stompbox, from small room sounds to nearly endless washes of ambience.
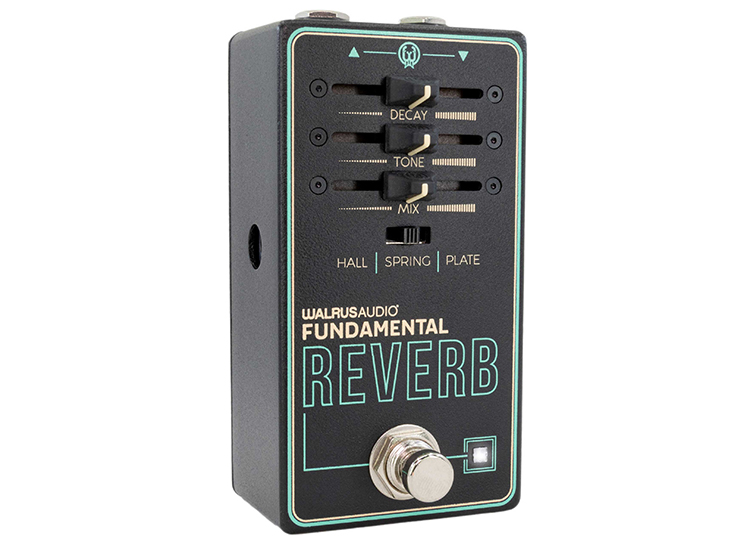
It has cool sliders for controls instead of knobs, and like the JHS 3 Series stuff we saw earlier, this pedal is built in the USA by a boutique pedal brand. This means it not only sounds excellent, but it’s amazingly good value, too!
Looper Pedals
If there’s one pedal we genuinely believe that every type of player should try out (aside from a tuner), it's a looper. A looper pedal is a great way to build up texture in your sound, the creative possibilities are truly endless and having so much power at your feet is awesome. It’s a great way to spice up your practice sessions - just lay down some chords and add some riffs over top or mess around with layering different effects. By building and layering many tracks on top of each other, any guitarist can sound like they have an army of players behind them.
For us the MXR Clone Looper is one of our favourite and is a great addition to any board. It’s compact, easy to use and a whole lot of fun. Check our Keiran taking it for a spin.
Order and Connect Your Pedals
Now that you have your first collection of pedals, it’s time to arrange them into some sort of order. There is a general rule of thumb here, and it looks like this:
Guitar > Tuner > Overdrive > Distortion > Modulation > Time-based FX > Looper > Amplifier
There are more categories, but they do not apply to us today so I’m leaving them out for sake of clarity. The order above is how you should connect your pedals, at least to begin with. Now, we are about to talk about cables and pedal board, but see before we do that? Here’s something to keep in mind. The pedals will operate at their best when connected this way, but that does not mean that you have to do that at all. Experimentation may lead to amazing results, so it’s okay to try different orders.
Also, even if you do decide to follow our linear path there (and once again, we think you should), then doesn’t mean that the pedals have to sit like that on your pedal board. We’ll get into this more presently, but have the pedals where you need them to be on the board, and then connect it to suit you. For example, the bottom half of the board is where you’re feet will reach most easily, so if you use your distortion pedal often, don’t place it up at the top on the board where your foot will struggle to get at it.
Connecting Your Pedals
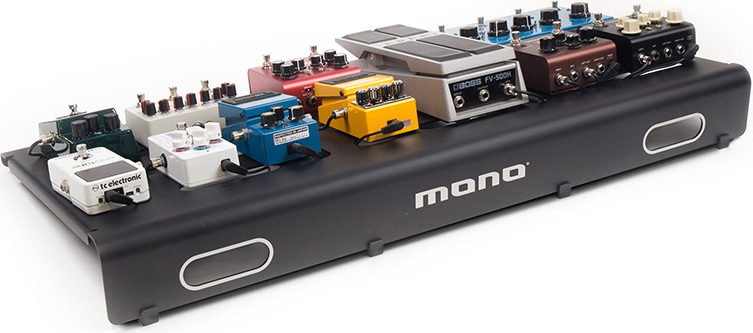
Do you have an order that works for you? Okay, good! The next thing I’d do would be to find a pedal board that fits this order you’ve come to, and then buy patch cables of the correct length for each connection. Pedal board fist!
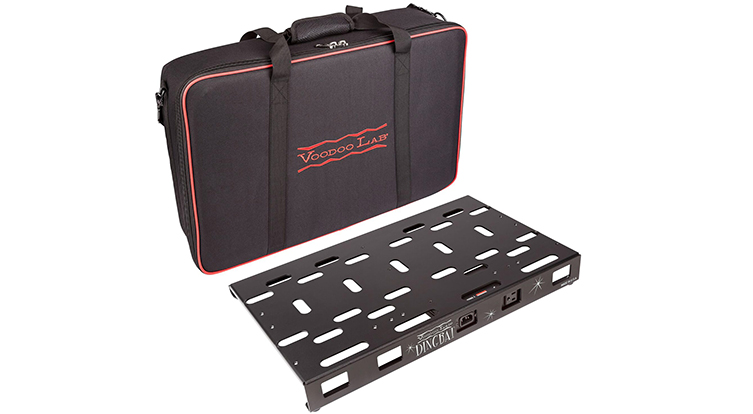
Finding the Right Sized Pedal Board
First thing is to settle on the pedal board you want. If there’s one word I can share here with you, it’s ‘future-proofing’. If you’ve bought 5 pedals, choose a pedal board that will have space for 7. If you have 3 pedals, consider a size for 5. Why? Because you are almost certainly going to buy more pedals, and pedal boards are things you shouldn’t have to keep buying over and over, each time you grow out of them, as it were.
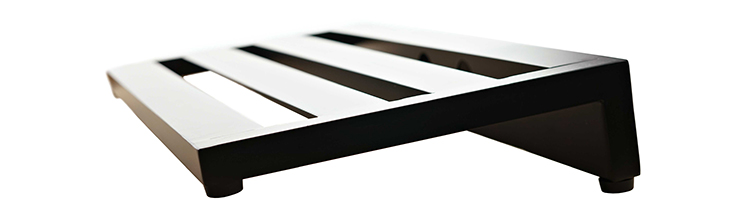
So, arrange your pedals as discussed on the ground, allow space for a couple of future pedals, and measure that space. The best pedal board for you will be the one that’s close to that size, but never smaller. Most pedalboards will be slightly wedge-shaped, and this allows you to use that underside when connecting cables and power supplies.
For now, browse pedal boards by the likes of Pedaltrain, D’Addario, Voodoo Lab, Mono and Ordo, and choose one that looks like it’ll handle your needs. A soft gig bag is essential, though a hard case for your pedals is only really required when travelling internationally, in my opinion.
If you want to have your pedals in a row, you’ll need a large board and you may find that you have a lot of ‘negative space’ left over. Most guitarists arrange their pedals into a couple of rows, which makes the most out of the rectangular shape of most pedal boards. My advice is to arrange things like the tuner on the top, since you probably won’t need that in the middle of a song. The same goes for pedals like compressors and noise suppressors, which we haven’t covered today.
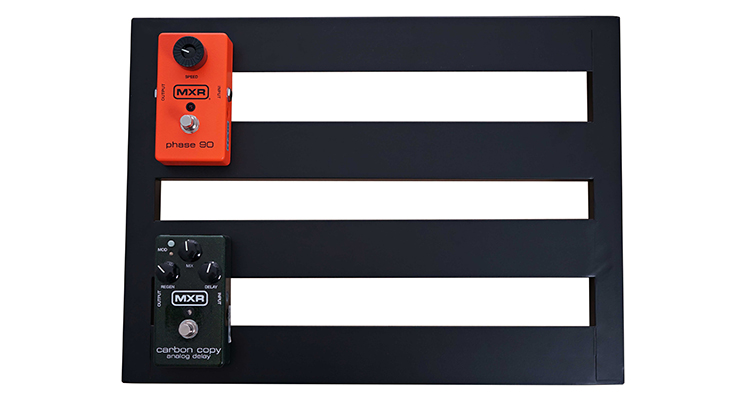
Things like distortion pedals need to be on the bottom row because they’ll be getting used much more frequently. Basically, think about how you use your pedals and arrange accordingly, with the most often-used pedals down on the bottom row. That said, if you plan on keeping your overdrive pedal on all the time (as many players do), there’s no need to have it on the bottom row, since you won’t be looking to stomp on it!
Patch Cables
A patch cable is simply a much smaller version of the jack-to-jack cable you currently use to connect your guitar to your amplifier. Alost all instances of patch cabling for guitar pedal boards will be these same ¼” jack connectors.
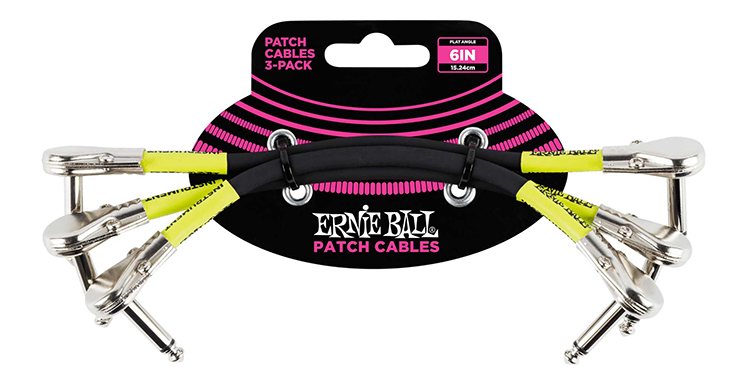
The trick now is to measure the distance from the output of one pedal to the input of the next pedal in the chain. It may be that you have them in a linear line (unlikely, but you never know), in which case, you’ll need the smaller patch cables you can find. More likely, though, is the fact that your pedals are somewhat dotted around to fit the needs of your feet, so you may need longer cables for pedals who are chained next to each other sonically but are not next to each other physically. Make sense?
Also, whilst it’s always good to save money where you can, I’ll advise you to spend on good quality patch cables. Any rig is only as good as its weakest element, and if your sound cuts out in the heat of a gig, you’ll be cursing like a pharoah as you try to locate the faulty patch cable. Buy good, and buy once. But also keep two (long-ish) spare patch cables, because to paraphrase Quentin Tarantino, it’s better to have them and not need them, than to need them and not have them. You know it makes sense!
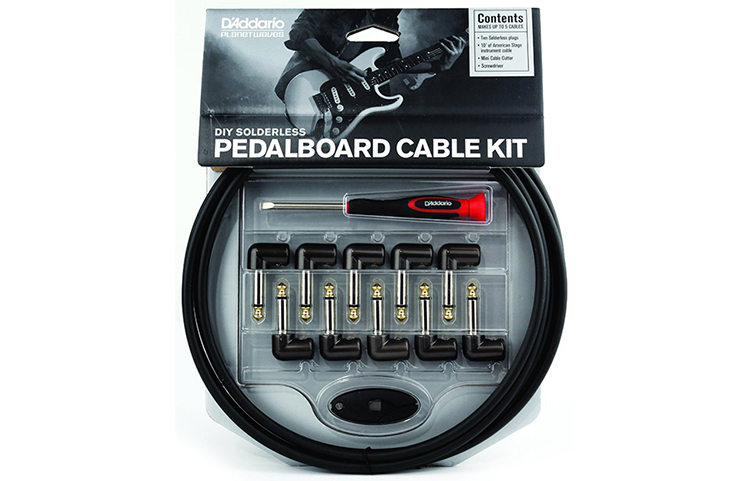
You can also buy a pedalboard cable kit, which allows you to easily make up your own custom-sized patch cables. It's easier than it sounds, and will let you have a very sleek, tidy board!
Purchase a Pedal Power Supply
This is one of those purchases that may not be the most exciting thing in the world, but it’s an essential one nonetheless! Powering your pedals with a proper power supply is simply the only sensible way to go: batteries start draining as soon as you plug a cable into the pedal’s input, so why deal with all of that hassle and uncertainty?
Ok, so the obvious thing here is to choose a power supply that will power all of your pedals. I’d say to maybe buy a supply that will cater for more pedals than you own, since we’ve already established that you’re likely to expand your pedal collection at some point.
There are two main types of power supply, and I’ll outline them here:
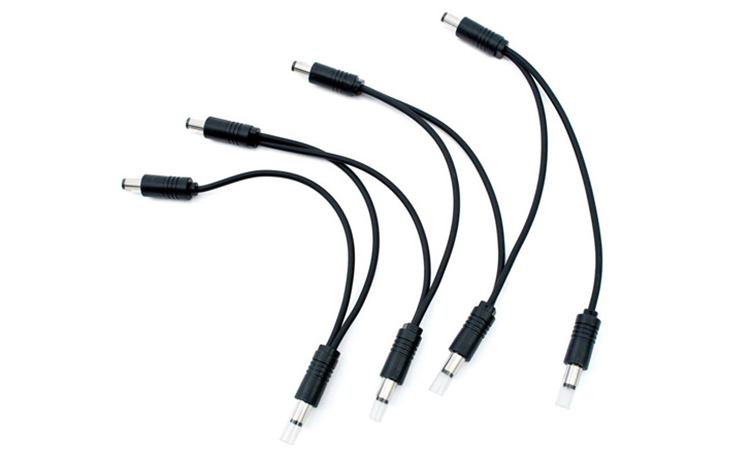
Daisy Chain Power Supply
This style consists of an adapter that plugs into the wall, and has a long cable running from it with a series of connections, one for each pedal. You daisy-chain them together in a linear line, hence the name. A good example of this would be the Truetone One Spot, which can power 8 pedals, or indeed more if you use an additional daisy chain cable.
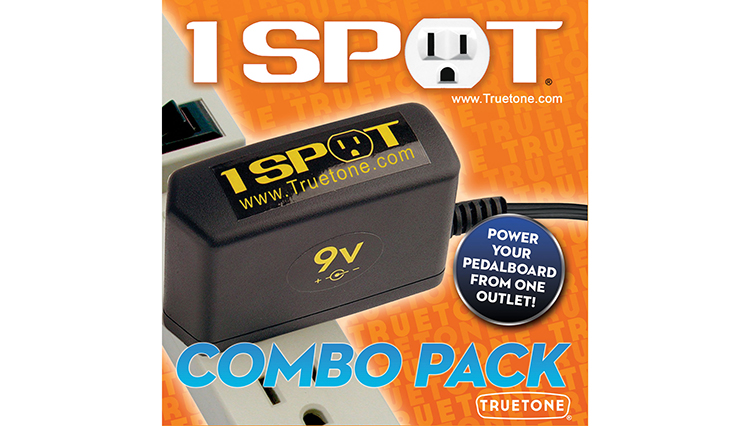
The pros of daisy chain power supplies would include their low cost, simplicity and ease of use.
Cons might include the fact that, if the daisy chain cable becomes faulty, you’ll lose power to all of your pedals at once. Also, you’ll often to to stick to only one voltage (more of this in a second), so you can’t have a mix of, say, 9v pedals and 18v pedals. This obviously limits choice and freedom.
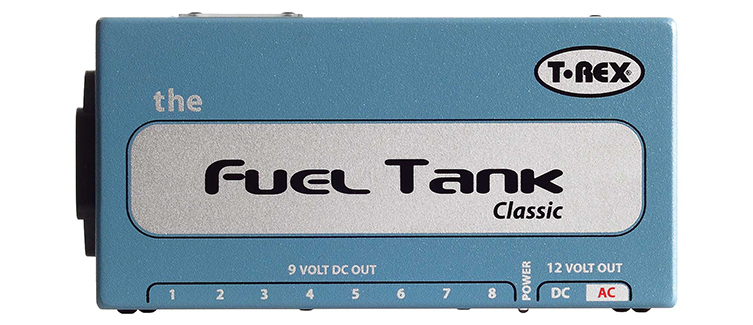
Regulated Power Supply
The other main type of power supply is a regulated supply. This normally has individual cables for each pedal, all running to a central power box or ‘brick’. Two good examples are the MXR M237 DC Brick and the T-Rex Fuel Tank.
The pros for this style of power supply are the ability to use both 9v and 18v pedals, and the fact that each output is isolated, so if one connection develops a fault, it won’t affect the rest of your pedals.
The downsides include a higher cost than a daisy chain power supply, and the extra physical consideration of another box to somehow fit on your pedal board!
So, if money and space are not too tight, I’d say a regulated supply with be the best choice for an easier life. If, however, funds and/or pedal board real estate are at a premium, then a good daisy chain supply is the way to go.
However, there is one other sneaky way…
The Famous BOSS Tuner Power Supply Trick
Did you opt for a BOSS TU-3 Tuner as your tuner choice? If you did, it has a very handy secret function, and it might make a real difference to your ideas and selections.
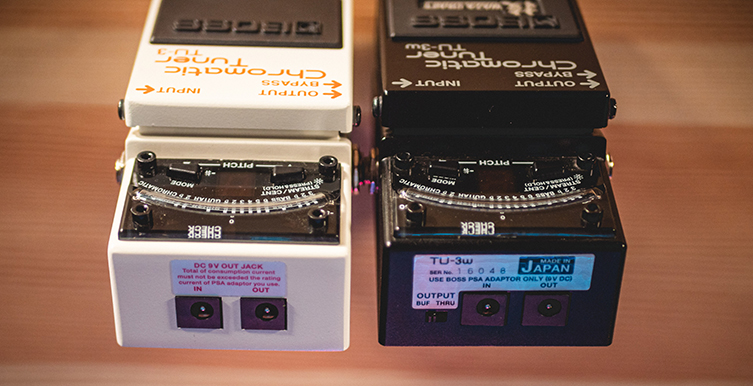
Basically, if you use a standard single-use power supply with this tuner (if other words, no batteries), then you can connect a daisy chain cable (not the whole daisy chain supply, just the cable) and power a bunch of pedals from the tuner! How cool is that? I mean, the tuner’s there anyway, why not put it to further use?
I’d still say that a regulated power supply is the best choice, but the TU-3 special trick is definitely one to know about, even as a last-minute backup when you’re in a pinch.
Pedal Voltage, Current & Polarity
These terms - voltage, current and polarity - are part of the language of guitar effects, and it makes sense to at least be familiar with these terms, in the context of pedals.
Voltage - power supplies deliver a particular voltage to an effect to power it. 9 volts (9v) are the most common, though some power-hungry pedals may need 12v or even 18v. You’ll be able to know what each pedal needs by looking at it chassis, around where the power supply input is.
Some pedals (most often overdrive and fuzz) can actually operate on either 9 or 18v. The larger voltage actually cleans the sound up a little, offering more ‘headroom’ (the pedal will take distort only at higher volumes), which you may want to experiment with.
Current - current is the amount of power the pedal will use in operate and is measured in milliamps. Put simply, power supplies will have a maximum amount of milliamperage that they can take from your wall socket. Each pedal requires some of that, and complex pedals (like delays and digital effects) will take more of that draw than, say, a vintage fuzz pedal, which will typically not need too much. In practical terms, you’ll eventually run out of current, so you’ll need to factor that into your pedal choices. Pedals often state their ‘mA’ requirements next to their voltages on the pedal chassis, but you can also Google this if you’re not sure.
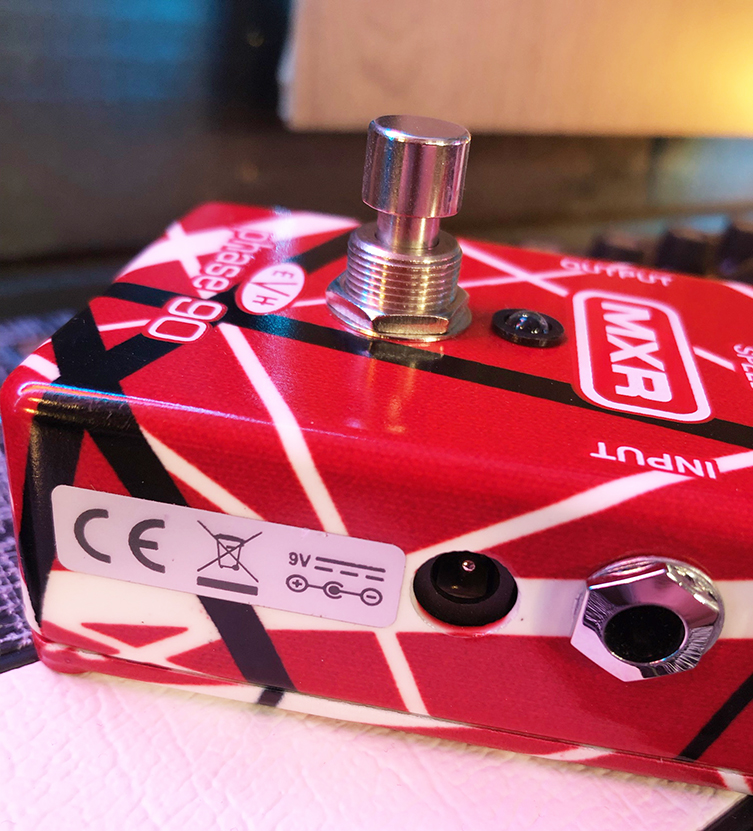
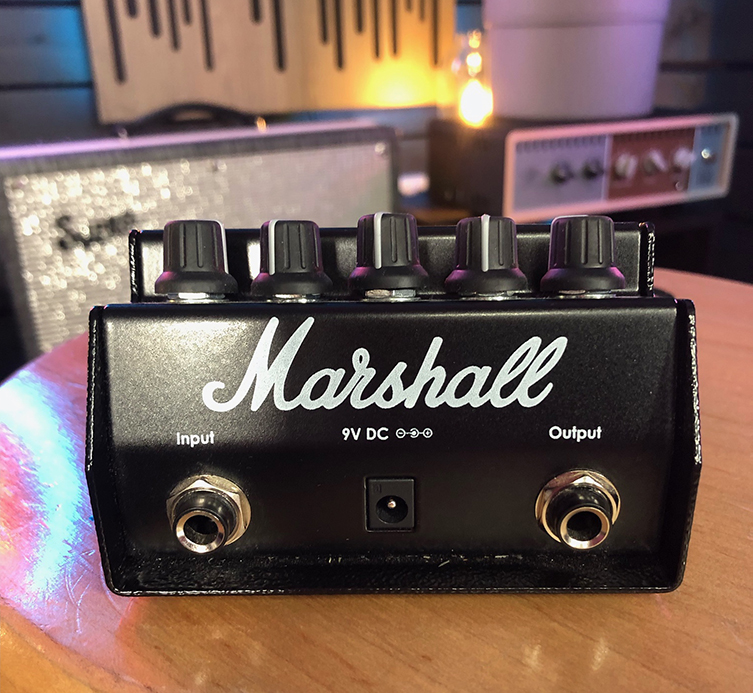
Polarity - Polarity can be a complicated thing to explain, but in the context of what we need today, it relates to the two differing ‘rails’ that handle the electricity within your power supply. There is a positive and negative rail, and the vast majority of guitar pedals use what we can ‘centre negative’ polarity. Simply use a power supply that corresponds to your pedal, and you’ll see two examples of both voltage and polarity requirements on the two pictures in this section. Both show that the pedals are 'centre negative', as you can see from the circular diagram.
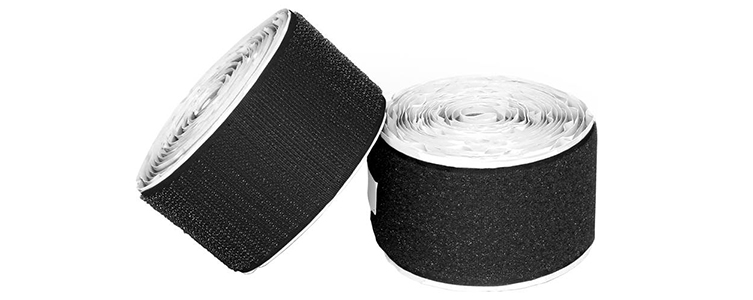
Mount Your Stompboxes to Your Pedalboard
We are almost there! It’s now time to fasten your pedal collection to your board! The time-honoured method for this is to use adhesive velcro, which you can buy in rolls. Simply lay out the pedals in the formation you decided earlier, and you’ll know where to put the velcro pieces. It hopefully goes without saying, but use one side of the velcro (the ‘teeth’ or ‘hooks’) for the pedals and the other (the ‘loop’) for the board. Keep it the same for all of your pedals and you can switch things up a bit over time.
If you opted for a Pedaltrain pedal board, you can use their own True Fit Mounting Kit to cradle things like power supplies underneath the board, where they rise up and have a little free space. It’s a good idea, and keeps things neat and tidy! Otherwise, if you have space on top on the board, you can attach the power supply in the same way that you’d velcro the pedals.
Well Done: You Have a Pedal Board!
That’s pretty much it: you’ve nailed it! You have a pedal board! You’ve chosen the effects you want to use, you’ve bought a board and a power supply, and you’ve put them all together like an absolute champion. The great thing is, you can swap things around, mix and match to your heart’s desire any time you feel like it. For now, though, you’re sorted!
What next? Get playing, of course!