You’ve just bought your first guitar? Congratulations! Someone’s given you one as a gift? Even better! Welcome to the world of guitar playing!
Now, you have this shiny new guitar sitting there and you’re now thinking: what’s the next step? What now? Where do I start?
Don’t worry, we’ve got you! We know it can be a little intimidating to be faced with this amazing new object, full of switches, knobs, strings and wood. Are you supposed to be doing things with this other than gingerly playing notes?

Let’s step in here and help out. Today’s blog describes, in layman’s terms, 6 things you can do - in fact, 6 things you need to be able to do - in order to keep your new six-string friend in tip top playing condition. It’s all pretty simple, and it’s all pretty easy. Let’s go!
Contents
See If You Need to Replace Strings
Make Sure You Are In Tune
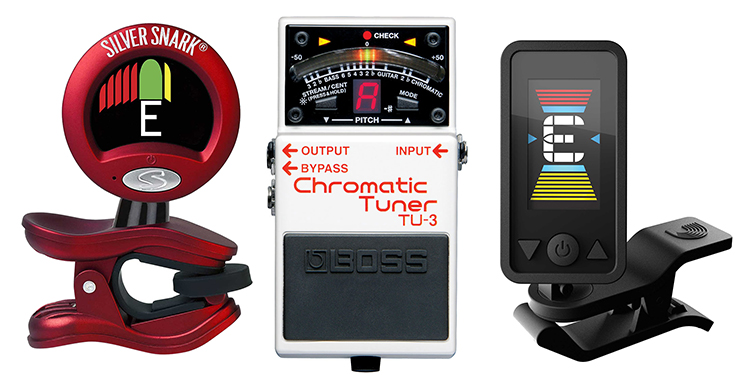
First off, you need to make sure your guitar is properly in tune. Sounds obvious, but this is the time to get that habit down for good. You can buy a number of tuners at guitarguitar, including the type that clips onto the headstock, and you can also download numerous free tuner apps on your phone. I recommend doing both, actually: the physical tuners may be a little more accurate, but the apps mean you’re never stuck for a tuner when you need one, since it's always right there on your phone!
When tuning, just go over each string a couple of times to make sure everything is settled. Tune the lot (low to high, high to low, it does not matter) and then start again.
This is doubly true if you have a guitar with a tremolo/whammy bar. You may need to tune up a number of times before the tremolo settles, but you should notice the tuning ‘calming down’ a little each time, so just keep at it until you are perfectly in tune. Don’t be someone who thinks it’s okay to play an out-of-tune guitar, okay?
Tuning Instant Tips
- Tune up to a note, not down - if a note is a little bit high in pitch (sharp), then detune it slightly lower than correct pitch and then tune up. Tuning up maintains better string tension because you are tightening the string, not loosening it.
- Tune then tune again - tune each string one at a time and then go through them all again, because it’s likely that the very act of tuning some strings will affect others. This is particularly the case if your guitar has a tremolo!
Check for Good Intonation
What is intonation and how do you check for it?
Okay, intonation is when the note that you play is the pitch it’s supposed to be, rather than flat or sharp. If you play a ‘D’ note, say, at the fifth fret of the second heaviest string, you want that pitch to actually be ‘D’ and not a close but slightly ‘off’ version of that D. With us?
So how do you check this? And how do you sort it if it’s needing some attention?
Thankfully, these are easy tasks. Grab that tuner that you own, and play a 12th fret harmonic on each string of your guitar, one string at a time. What’s a 12th fret harmonic? It’s where you lightly touch the string over the 12th fret (the metal fret, not the wood where you put your finger to make the note) but don’t press down. Plucking the string will make a high-pitched note sound: this is a 12th fret harmonic, and it’s the same note as the open string, it just sounds exactly one octave higher.

So, play that 12th fret harmonic and watch your tuner. If the tuner reads the note as being in tune, then that string should intonate fine across the whole spectrum of frets. Happy days! Now do the same for each subsequent string. If all of them are ringing true to pitch, then your intonation is grand and you can move on from this step, happy in the knowledge that your guitar is sounding correct. If not, then you have a slight issue with intonation.
Relax! It’s an easy fix. Look at the bridge of your guitar, and inspect where the string sits. This part of the bridge is called the saddle, and it’s normally adjustable from the back with a star-headed screwdriver (if you have a stratocaster or telecaster-style guitar) or from the back of the bridge with a slot-head screwdriver if you have a Les Paul/SG-style ‘tune-o-matic’ bridge. The individual string saddles can be adjusted forwards (towards the pickups) and backwards (away from the pickups) to help compensate for intonation issues. So, if your 12th fret harmonic indicated a little sharp - that, is, higher than the centre - then you need to effectively shorten the string’s travel by adjusting the saddle forwards, towards the pickups. Just try a little, retune the string and sound the harmonic again until your tuner hits the centre mark.
If the harmonic sounded flat - that is, lower than centre pitch on the tuner’s display - then that saddle needs to go back a little bit until the harmonic sounds exactly in the middle of the tuner’s display, just as before.
Do this for all of your strings, and remember: a little adjustment goes a long way on the saddles! It’s easy and you’ll be done in a few minutes.
See If You Need to Replace Strings
Can you see any signs of discoloration on the strings? Any signs of wear? If so, get them changed for a new set as soon as you can! Here’s a video we made on restringing an electric guitar, so follow these steps and you’ll be fine.
Now, strings may look fine but still be ‘spent’, as it were. If you are having trouble with your tuning, and you’ve been through those intonation steps outlined earlier, then it could be that your strings are just 'done': given up the proverbial ghost. This happens after time and use, since the metal eventually stretches past the point of being useful.
Strings are consumables, so just carefully change them for a set of the same gauge (changing string gauge creates more jobs for you, so leave that just now) and get back to enjoying your guitar!
If you’re not sure what gauge of string your guitar currently takes, it will most likely be either gauge .009-.042, or .010-.046. Given the comparative lack of tension (and therefore, hassle to sort), we recommend going for the ‘nines’, the .009-.042 set. If these feel weirdly light, then that would indicate that your guitar had a set of ‘tens’. Ask for them next time!

String Change Instant Tips
- Stretch the strings - after restringing, carefully pull each string away from the fingerboard to ‘stretch in’ the metal. Not too much of course, but use reasonable pressure and you’ll notice how much the string has gone out of tune. This is good! Stretch them now and sound in tune, or leave it and the guitar will keep sliding out of tune until the strings are stretched from playing.
- Is the nut wide enough? - If you are fitting a heavier set of strings, one gauge heavier might be fine but significantly heavier strings pose problems. One of these is that the actual nut itself may not be cut to accept such thick strings, so pay attention to how easy the strings sit in the nut grooves. If they stick - or don’t fit at all - then your nut needs modified for the heavier strings.
Adjust the Action
Adjusting what we call the ‘action’ of a guitar can radical effect on how playable it is. In order to adjust the action, you will need a string gauge or a ruler that’s able to measure millimetres (with no gap at the end before the measurement begins). But first, what is ‘action’? Well, in basic terms, it’s how the strings sit in relation to the fingerboard. A high action is when there’s a fair sized gap between the strings and the fingerboard, as you look down at the neck from a playing position. A low action is where the strings sit very close to the frets and fingerboard. A high action makes your guitar tougher to play, and so a low action is preferred as long as it’s not so low that your guitar begins to sound buzzy.

You can eyeball your guitar to see if the action is low or high by seeing how much clearance there is around the 17th fret, from the bottom of the string to the top of the fret. Get your string gauge or ruler and measure this distance. Fender’s official guidance, by way of example, states that a distance of 1.6mm (or 4/64”) is how they set up their guitars at the Fender factory. Aim for this as a starting point.
Depending on what type of guitar you have, you can then adjust the string height accordingly, using a small allen key in most cases. For Strat/Tele types, each bridge saddle will have two allen key points on top: turn these an equal amount of times to raise or lower to your preference. Guitars with Gibson or Epiphone style bridges tend to work by raising or lowering the full bridge using special wheels that sit under the bridge posts. As always, make small adjustments, retune the guitar and have a look at your progress: easy does it!
Action Instant Tips
- High action - go for a slightly higher action if you are a heavy-handed player. It’ll help! Also, keep the action slightly higher if you want to play slide guitar.
- Buzz - fret buzz is actually inevitable to some degree - it’s metal on metal after all. If you hear fret buzz when you play unplugged but no buzz comes through the amplifier, then you’re fine. If you hear a buzz through the amplifier, it’s worth assessing the action.
Keep it Clean
Keeping your guitar clean is something you’ll do for a while when it’s new, and I recommend making it a habit. It’s not even about fingerprints, which are inevitable. This is more about dust and grime. Dust can get into the ‘guts’ of a guitar and impair performance after a while: scratchy sounds from the controls are one telltale sign of this. Keeping the guitar clean can minimise this.
Fingerboards are where long-time damage can accumulate. Fingerboards need to be looked after, and it doesn’t take much at all, so please get into the routine! If you change strings, say, every 6-8 weeks (don’t wait until they are disgusting before you restring!), then I’d say that every other string change (so three times a year), give the fingerboard a good clean with a rag, and then add some lemon oil if the board is made from rosewood, laurel or similar. Maple and ebony don’t tend to need the oil because they are self-lubricating.
Cleaning Instant Tips
- Look at the frets - check for grime at the sides of the metal frets themselves. Careful scraping with a solid straight edge (you can use a craft knife or Stanley if you’re careful not to nick the wood) will get rid of this stuff. Leaving it on there is not only gross but will rust the frets. That’s an expensive job to fix!
- Have a soft paintbrush handy - find yourself a regular paintbrush with soft bristles and keep it in your ‘guitar stuff’ box. This is what you’ll use (dry, in case that needs to be said!) to clean and dust in all of the tricky-to-reach areas of the guitar like under the strings, the bridge and around the tuners.
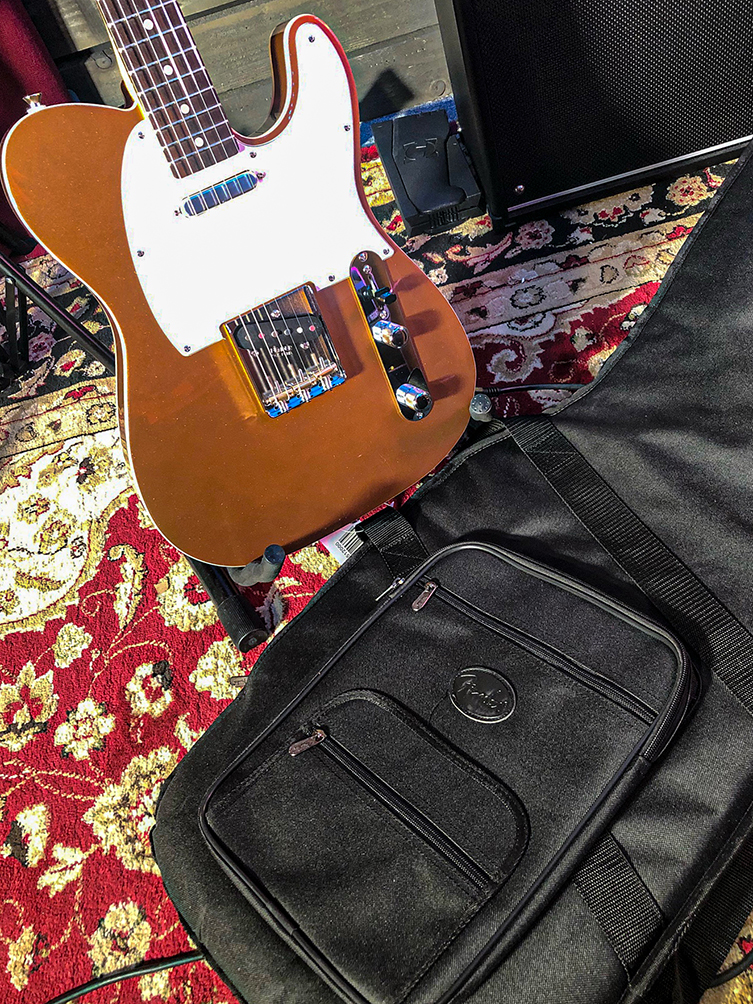
Get a Case
Our final tip for new players is to buy a hard case or padded gig bag for your guitar. Whilst it’s good practice to have the guitar out where you can see it and play it, sometimes that isn’t feasible. Having a good quality gig bag or hard case handy to store the guitar in will protect it from the worst of temperature changes, pets, toddlers and all other household miscreants.

You’ll be wanting to carry your guitar around soon enough, whether to a friend’s house or to a local open mic night, so getting a case of some description is a good early purchase!
Buy according to the shape of your instrument: not all cases are universal! As always, our staff are around to offer guidance and assistance.
Guitar Case Instant Tips
- Go for the fit - use a case that fits the guitar snugly, or the case won’t be doing its job properly, which is to protect your instrument. Don’t just use one large gig bag or case for every single guitar you take outside!
- Soft case or hard case? - my advice here is based on years of gigging experience. I use a hardshell case when I leave the UK, and when my guitar will not be by my side at all times (airport luggage etc). Otherwise, I use good quality padded soft cases: they are lighter and much more practical.
The most important thing to do with your new guitar is, of course, make some noise! Enjoy your guitar, don’t be afraid of it, and just grab it whenever you have a spare minute! Whatever you need, we’re here to help. Have fun!